12.13.2007

You thought Id quit eh?

Let's just call it slow going. Do you have any idea how boring it is for me to take thousands of pictures of the same damn boat over and over when the only thing that changes is how smooth it is?

You can't feel it, so it's pointless! "Look, that shade of grey is different than the shade of grey over there, he must have switched grits.... ooooo..."

Needless to say, it's different now. It is all greyish, silky smooth, and bordering on ready for paint. Yesterday after work, Shayne came up to help me hoist the motor out of the boat again. He's a kind soul, but gullible. Once the motor was out, it was time to press on again, and get this thing outa the shop.

First, though, let's look at what we are contending with:


It's a little cold out there. We haven't enjoyed temps over the freezing mark in, well, awhile. We did have a short spell, but snow has basically been on the ground since we ate that turkey and his yam friends. As you are well aware by now, I don't have heat out htere, let alone insulation. I have been trying to either find tasks that don't require heat, or that I can be basically stationary and get under the IR heater. Today was one of those days.

With the motorwell emptied out, I put my carcass in there, took a sander with me, and got the last of the open spaces prepped. The whole boat has now been sanded. I also put as much filler as possible in a heatable space (the splashwell) on the tape, setting out to have it cure sometime before the fat man slides down the chimney.

It was a little something like this:


A 250/500w work light turns into a 250/500w heater pretty readily. Its basically infrared heat with more light than usual. Still rather effective.

Throw a towel into the mix to retain more of the heat:


Voila!

I'm going to ski tomorrow, so don't expect me to work on the boat.


E

10.20.2007

Fairly fair


Every boat builder will be familiar with this statement. I have reached "Good enough". I think Sam Devlin had a good point when he said in his book "You have to hate a boat to finish it". Im so sick of looking at fairing boards, swapping paper, cleaning out the vacuum and getting the refrigerator dirty that its time. There are several little spots that could use quickfair. They would require hours of longboarding. There are spots on the fillets that are going to be wavy due to a lack of concentration when I was taping. Guess what, Im done fairing.

Let't look at it from another angle. I'm betting that most readers are either building a boat or will be building in the future. Some have spent the time and effort to actually go back through and read this blog from start to finish (if not, its getting cold out, its rainy, grab a mug of warm beverage, nestle in, and read it.) and can see how the mistakes were made, and why places aren't fair. If you are an astute reader, in the pictures you can see where the boat is seriously deformed and is now perfectly fair. I'm not going to tell anyone where anything is, because its my secret. I think that might be the point, in the end.

It will be your boat. You built it. If you feel that you are out to build a boat for show, then each infinitessimally small detail will be perfectly faired. To whom are you trying to be perfect for? Some need this level of perfection for inner peace. Others seek the adoration of onlookers. This is especially true of the mahogany runabout crowd. The beauty of the boat and the joy of its use is lost in the spectator's staring at the finish and nothing else. This isn't my style.

Other will go through the process in drudgery, and at the first possible moment slob on paint, not caring about smooth surfaces and unfair areas. Their need to be done and put their boatbuilding experience behind them is more powerful than going a few extra steps to make the boat last beyond next summer. These boats will be left out, destroyed by the elements, and relegated to sandbox duty.

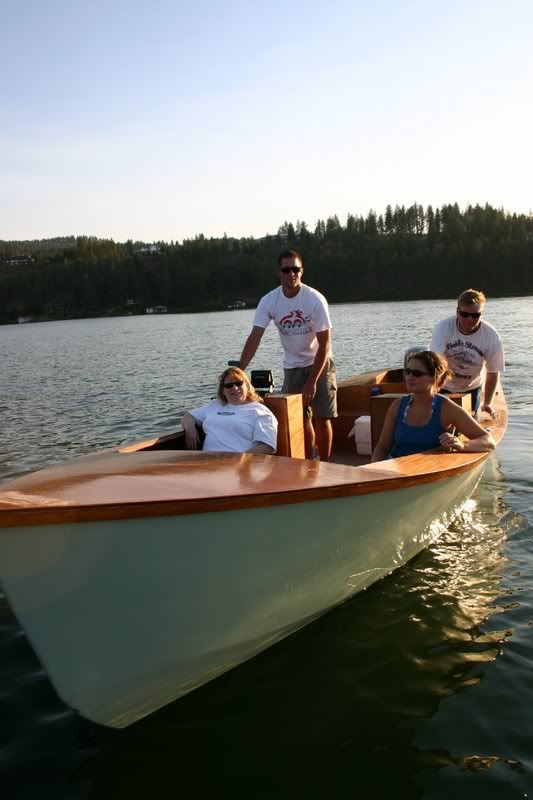
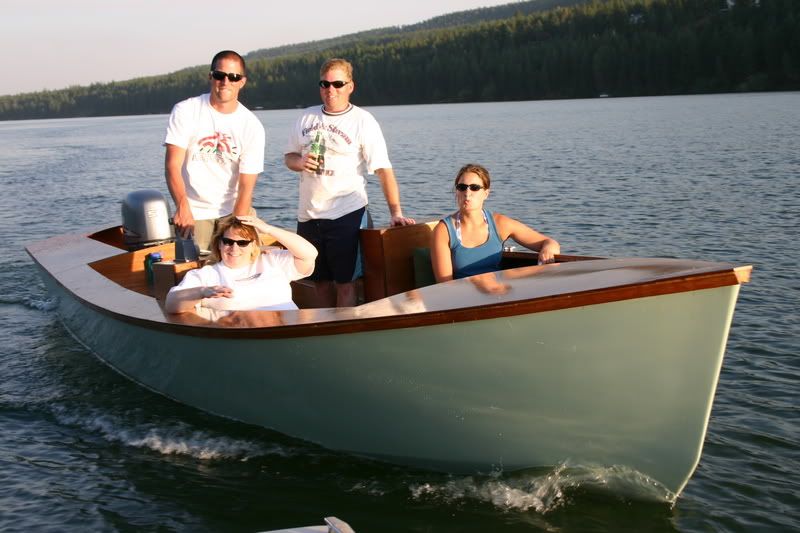
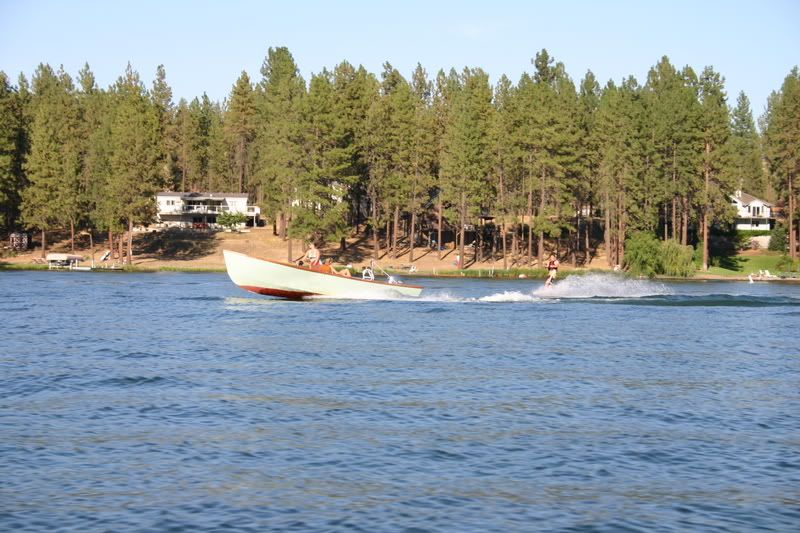
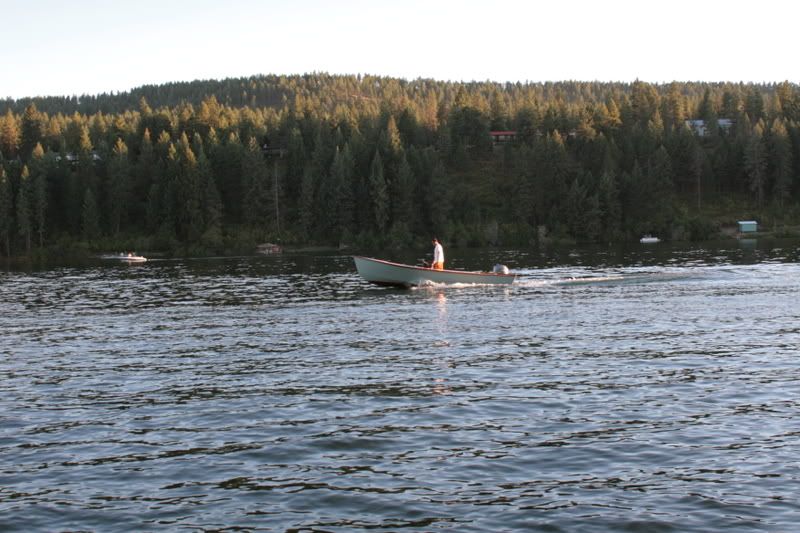
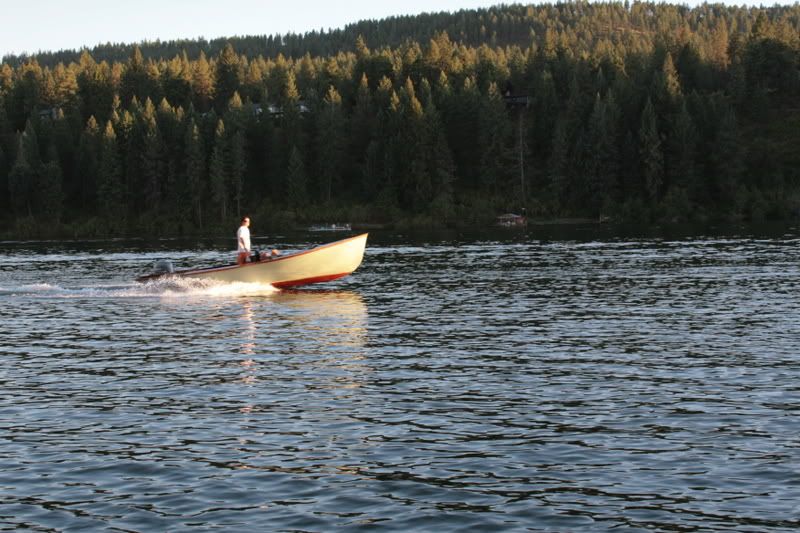
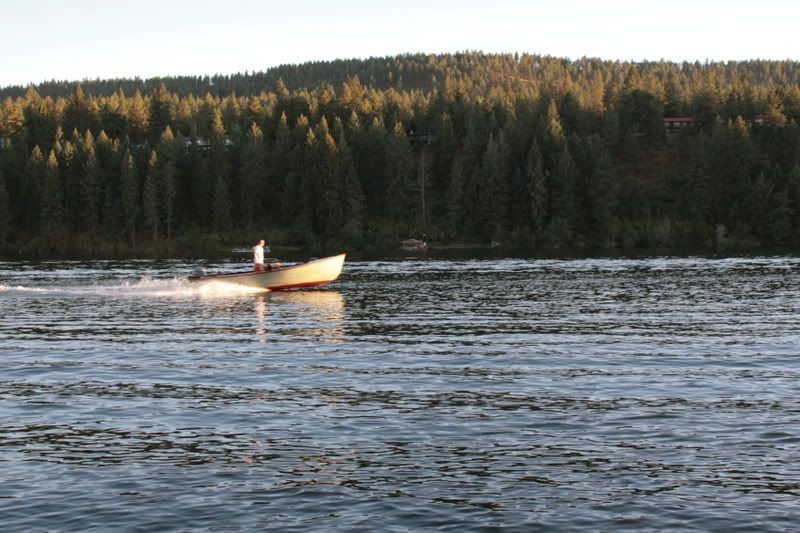
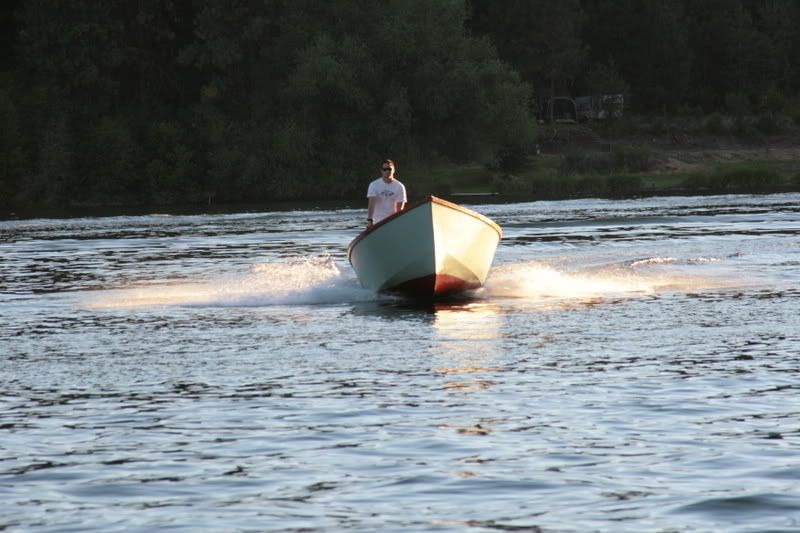
Im somewhere in the middle. I like smooth lines, I like nice paint. I can't see doing any varnishing, though its beautiful, as my life is too short. I want a boat I can be proud of, but one I can use day in and day out (yes, we use our boat more than most, probably 5 or more days a week, 6 months out of the year). I don't want to worry about rafting it up with my friends and scuffing the paint. I want to be able to run it up on a beach and not give it a second thought. I built this boat to use, to enjoy, to take my wife out on evening cruises at 6mph in the fading sunlight. I built it to get 8 friends together and see both ends of the lake, hit the beaches, and be social. I want to go find that lunker bass in the weed edges, getting as shallow and close as I can. At the end of the day, I want a boat that will provide us with enjoyment, year after year, with low maintenance requirements, but one that I will still look longlingly at as I leave it at the dock at night.

I think we are there. It's a little imperfect in places, just like me. It is rugged and durable, great to look at, and the only ones who know where the flaws are will be myself, and people who build boats like me. Depending on the other builder, they will either find my workmanship below theirs, and feel better about themselves, or they will see the world as I do. They will understand that life is too short to sweat every detail. They will see the little flaws and smile, knowing that when they build their next boat, they will have a few too, and that it's okay.

So following that diatribe (its like talking to a diabetic about their eating habits. Noone will listen to what I said, but it felt good to say it) there are a few tidbits and some great photos to show this time.

Firstly, my wife loves me. She knows I have a boat problem, and instead of nagging and harassing me about it, she enjoys the fruits of it and supports me. It means quite a bit to me, as I know it can be hard sometimes with how often I work on it and what it costs. To show her support, she got me this for my birthday:


This is an original H. Chapelle's Boatbuilding from 1941. Fantastic read, with tremendous info for boatbuilders of all kinds. Highly reccomended.

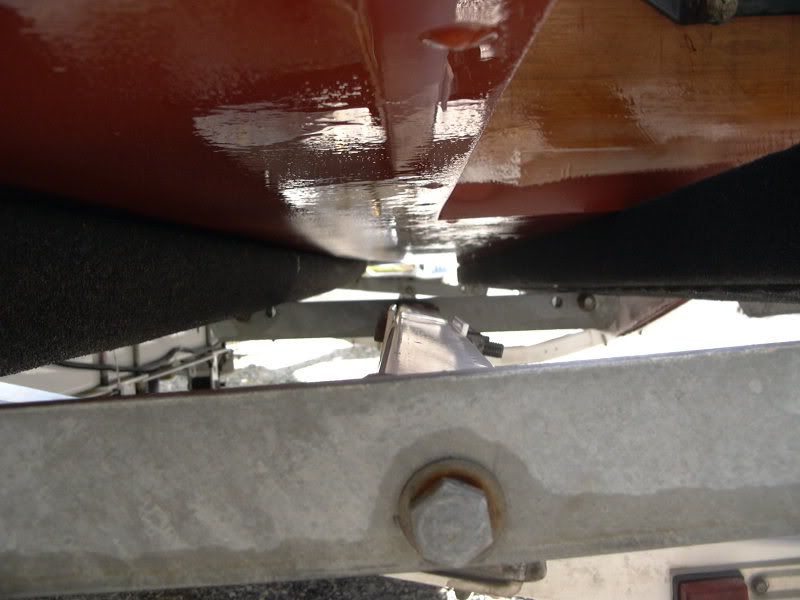
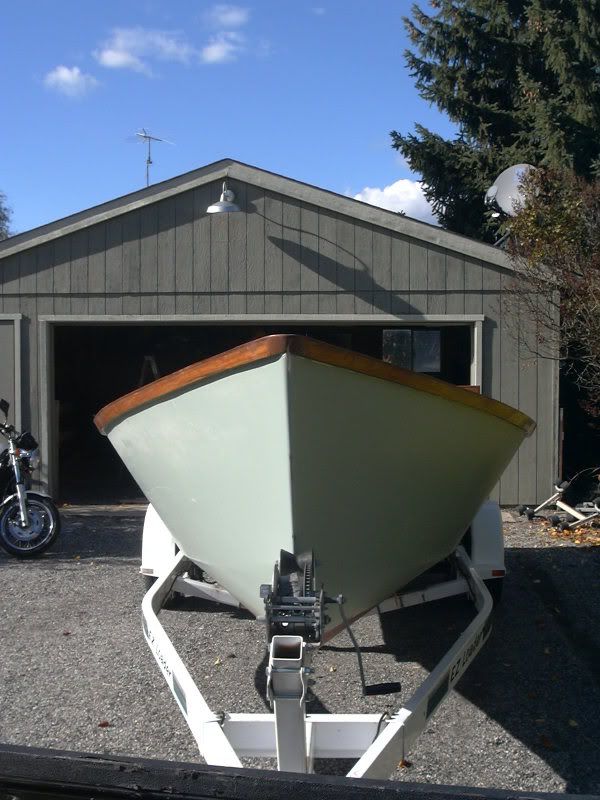
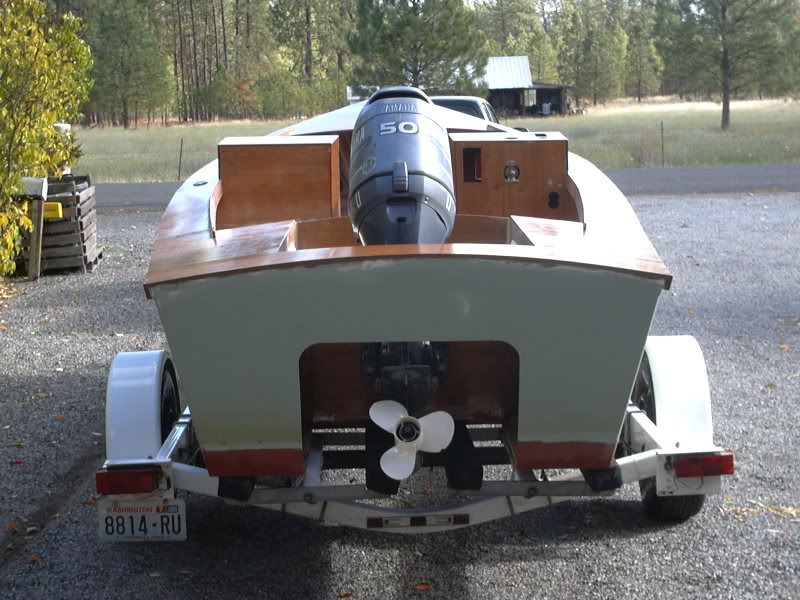
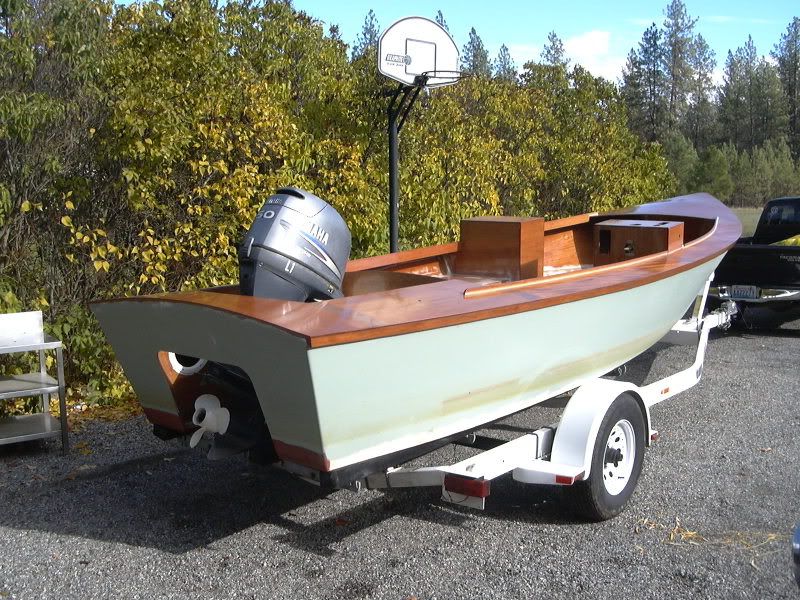
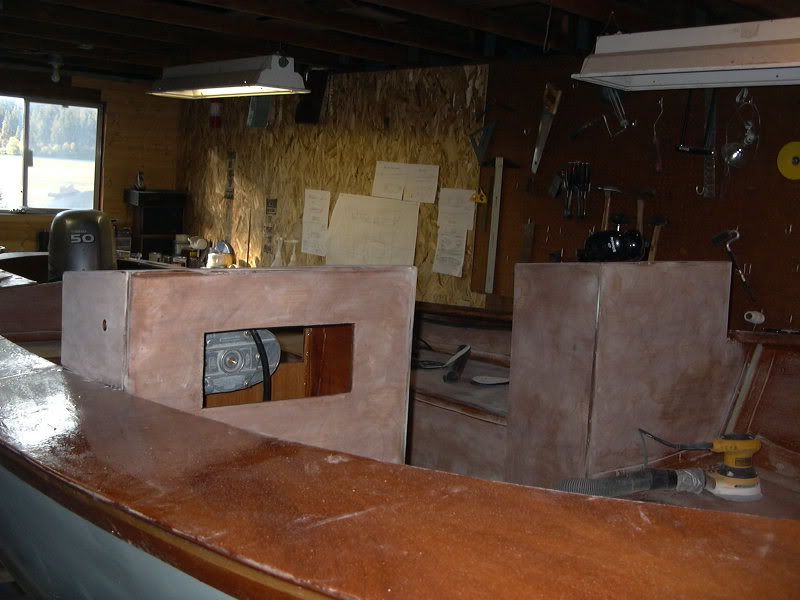
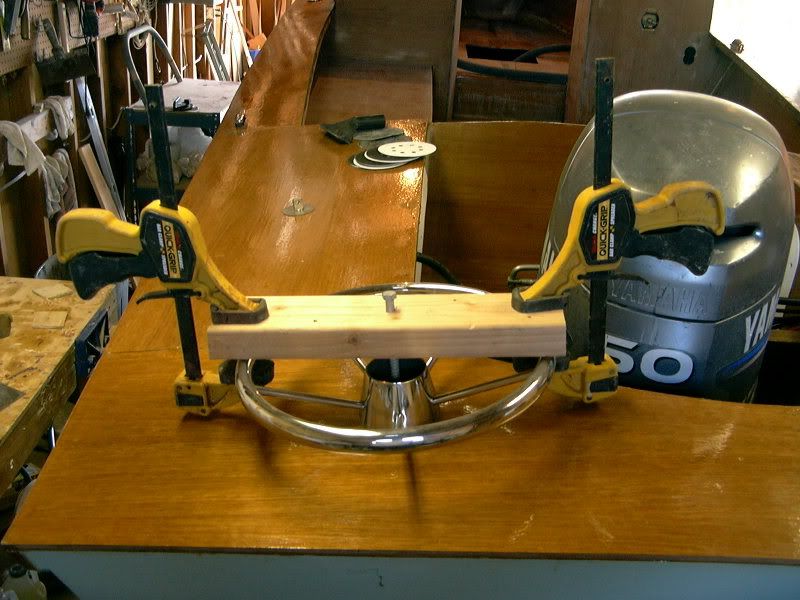
Secondly, the boat got some new digs. I found the first trailer I purchased was going to be tough to set up for this hull. Craiglist came to the rescue, selling that trailer and picking up the newer one. Mobile bunk brackets, more length, better suspension, and brakes that function, Im happy, shes happy.

This is how a boat should be supported, not the bunk contact to the hull:


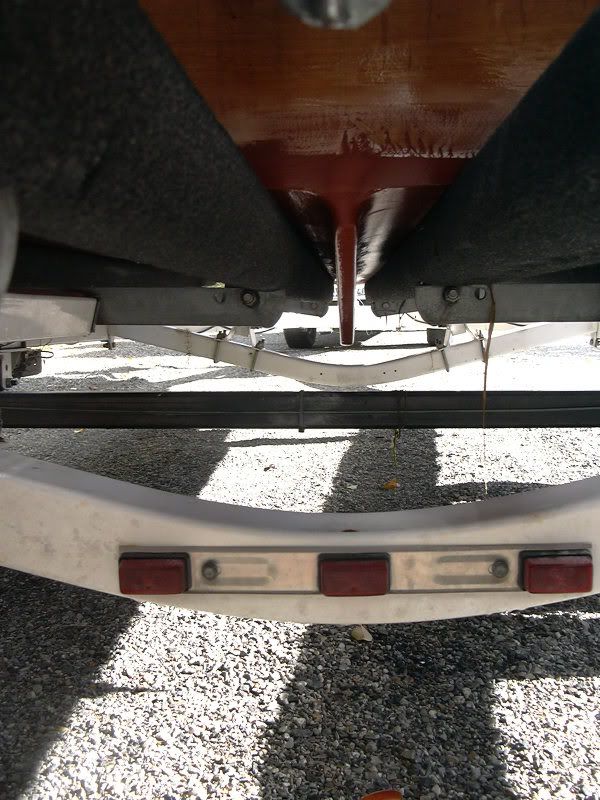
The bunks are also quite close together, as each side has two which are attached via brackets that pivot. One nice side effect of this is the skeg guides the boat onto the trailer, no matter how windy it is (when I switched trailers, winds were 25mph gusting to 40. The controls were not on the boat, and I did it with ropes only.):


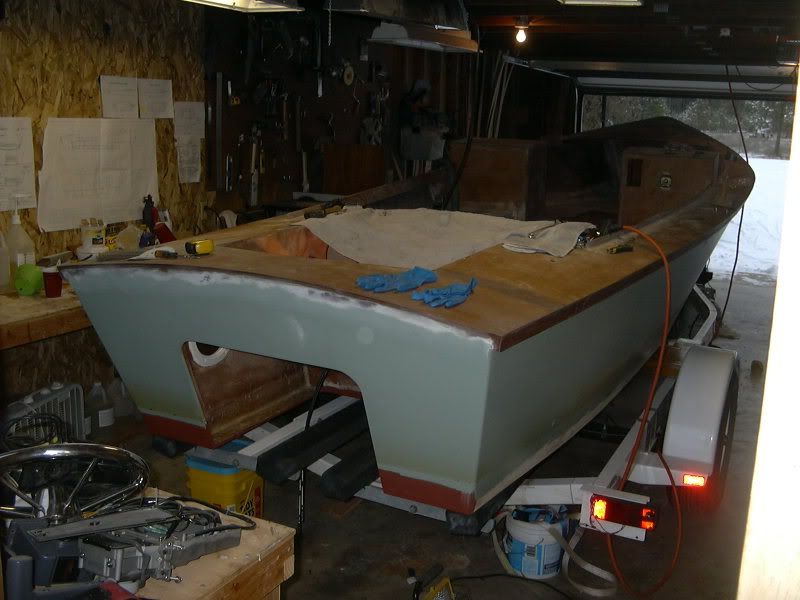
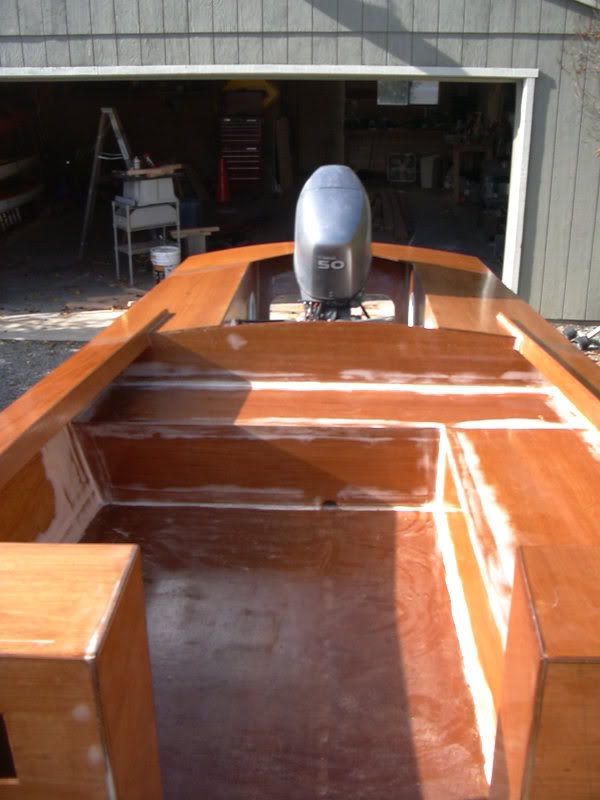
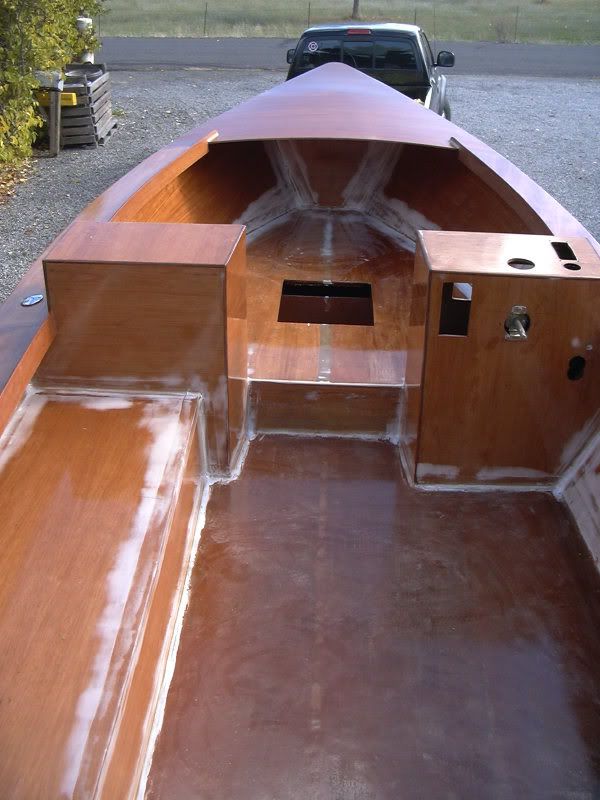
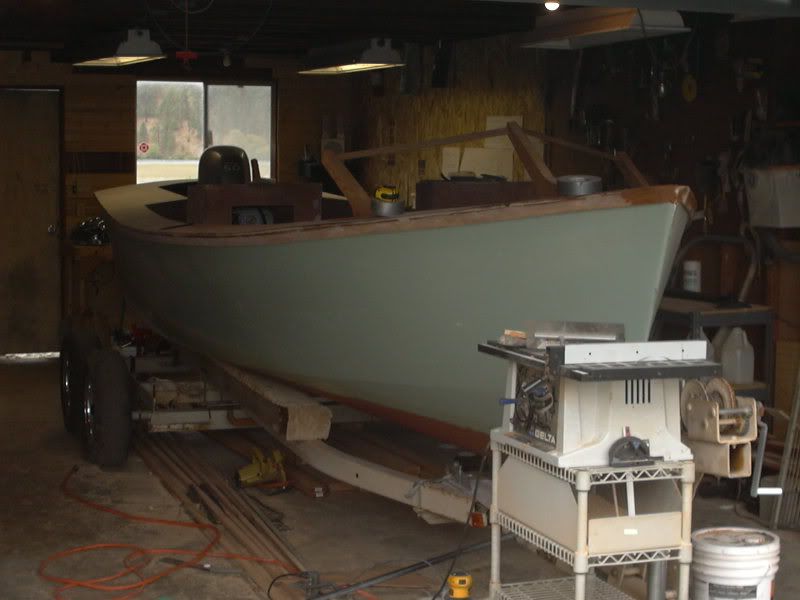
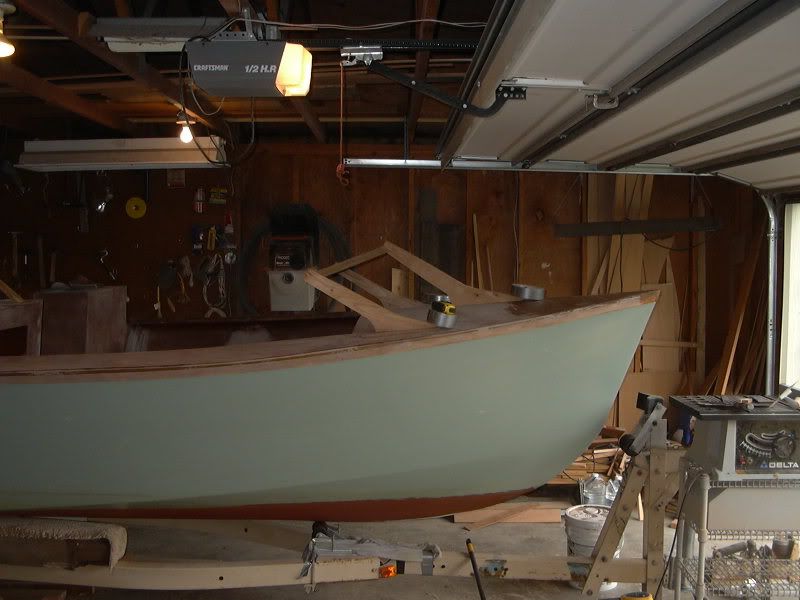
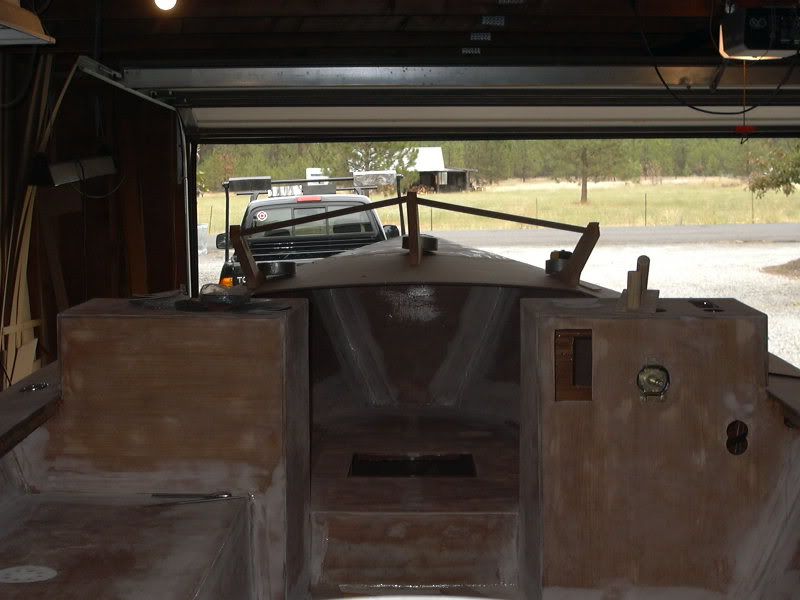
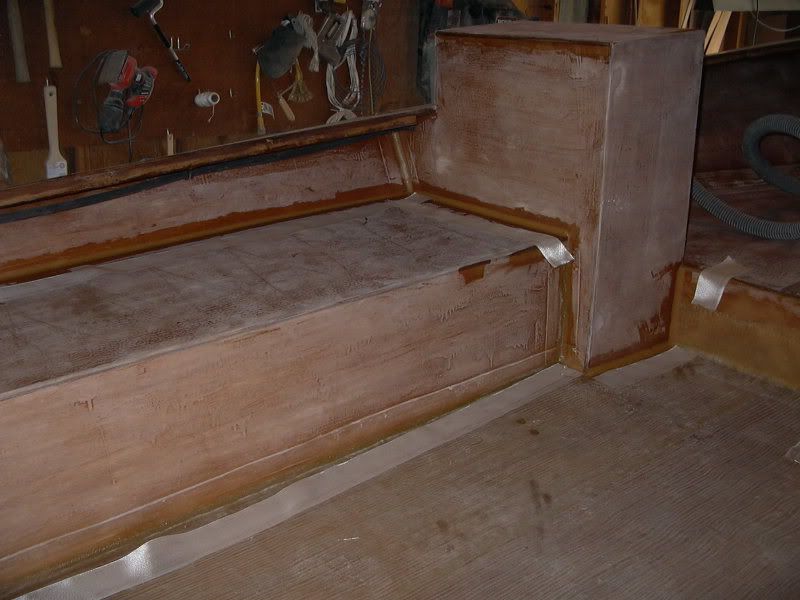
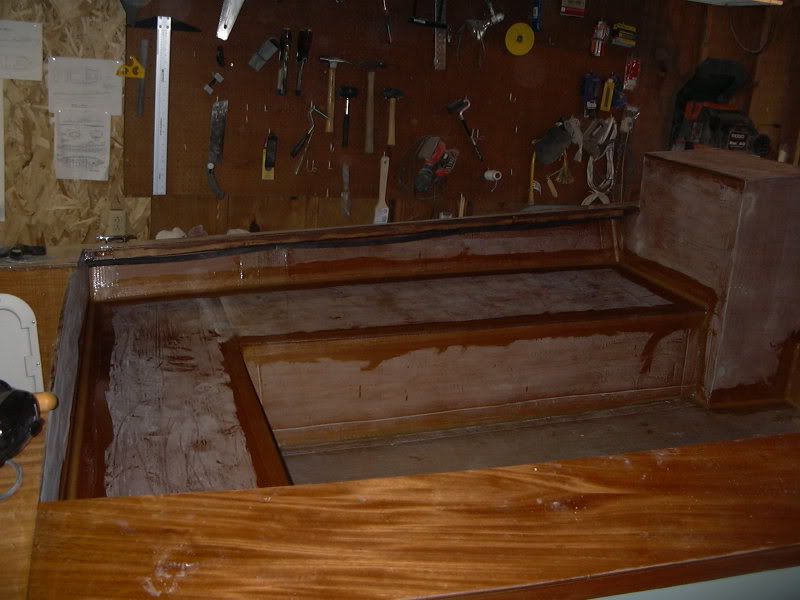
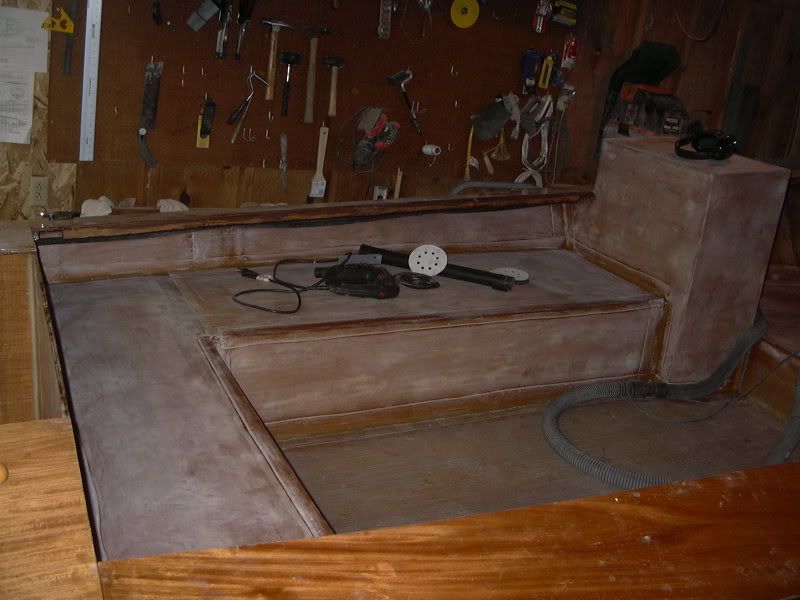
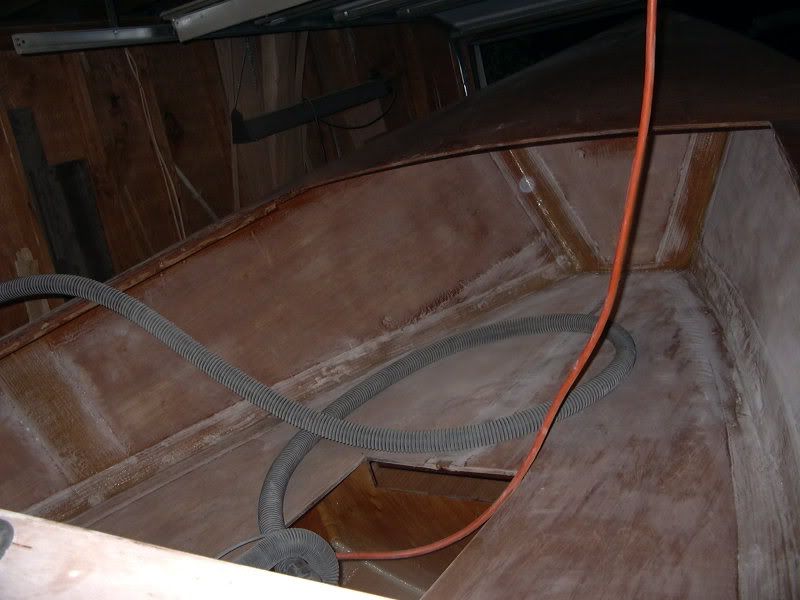
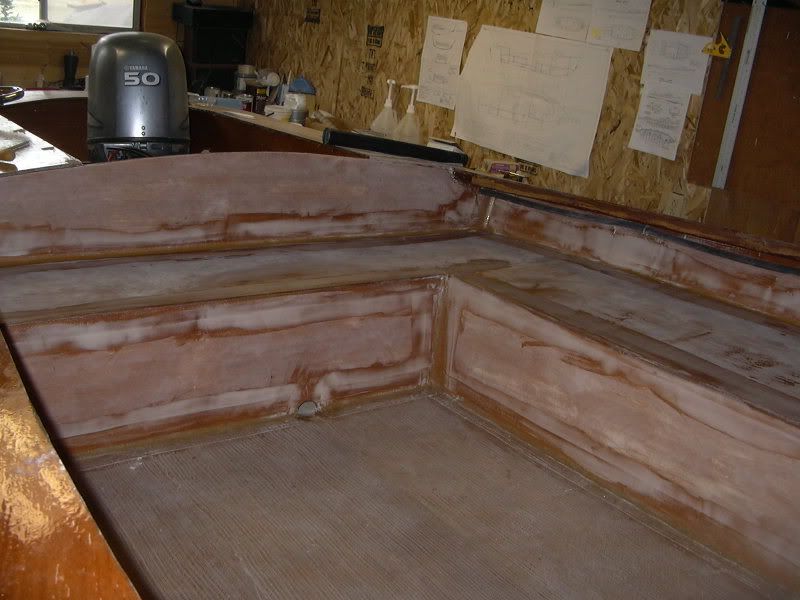
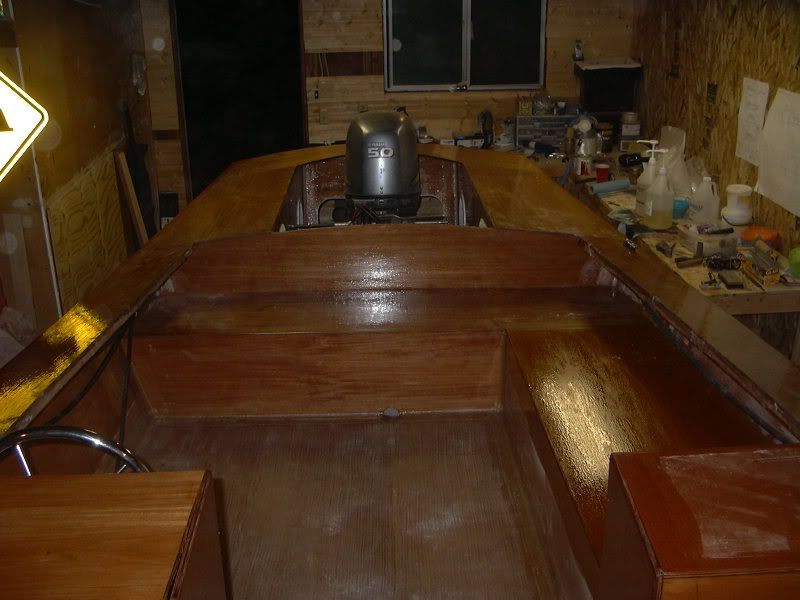
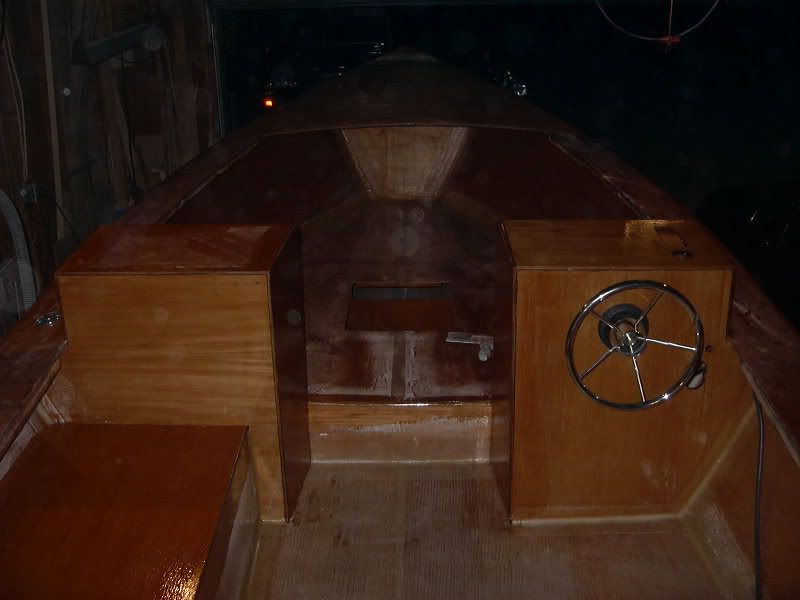
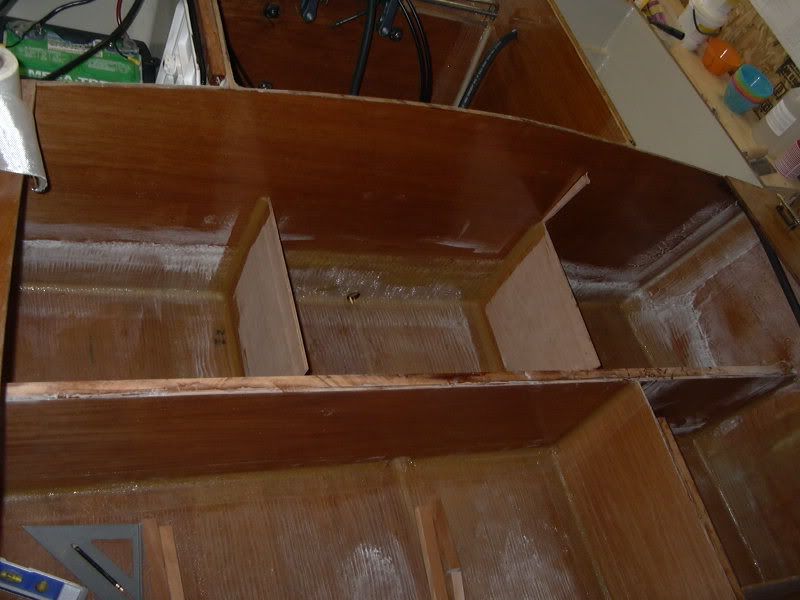
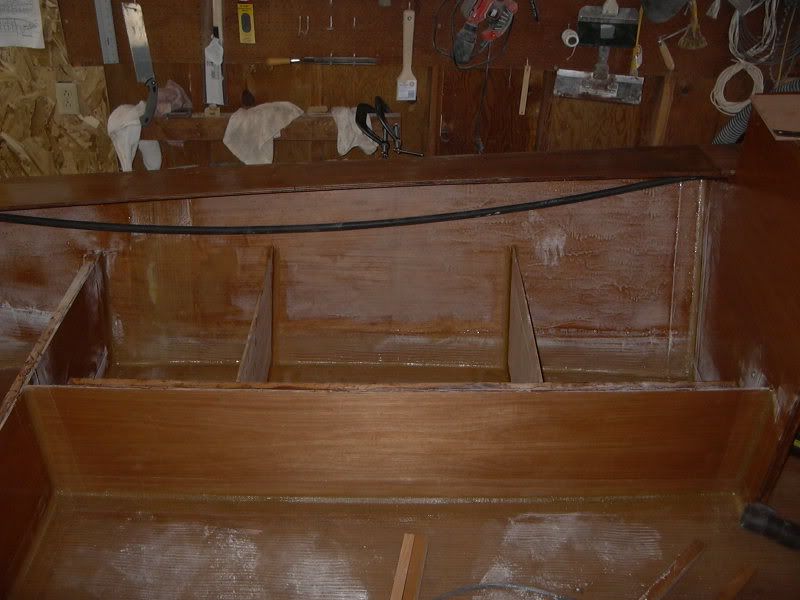
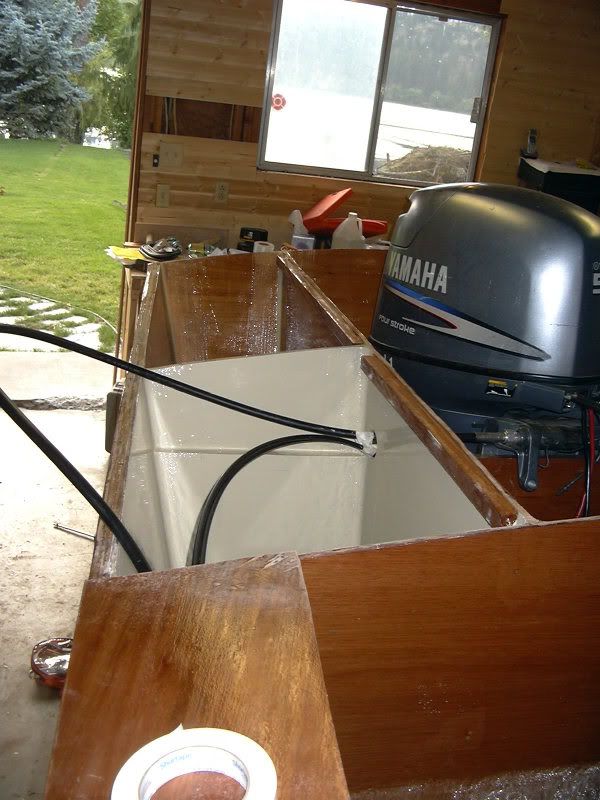
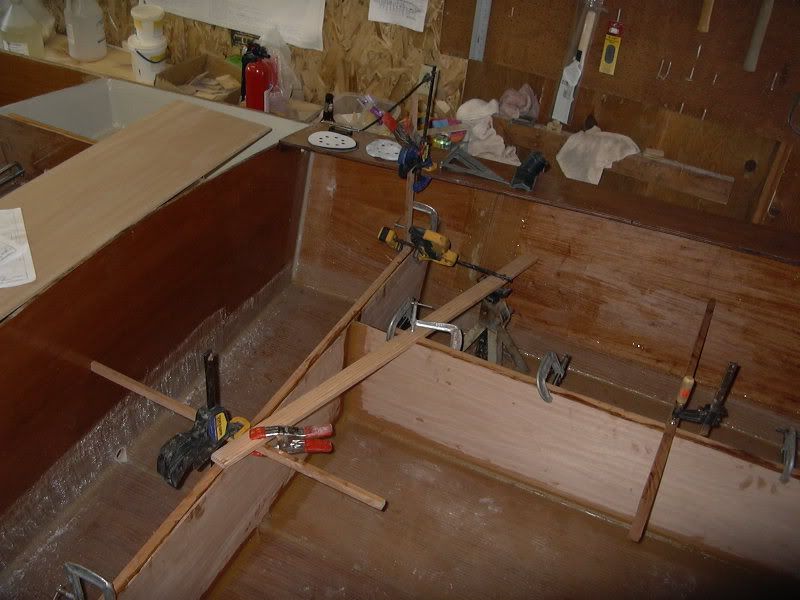
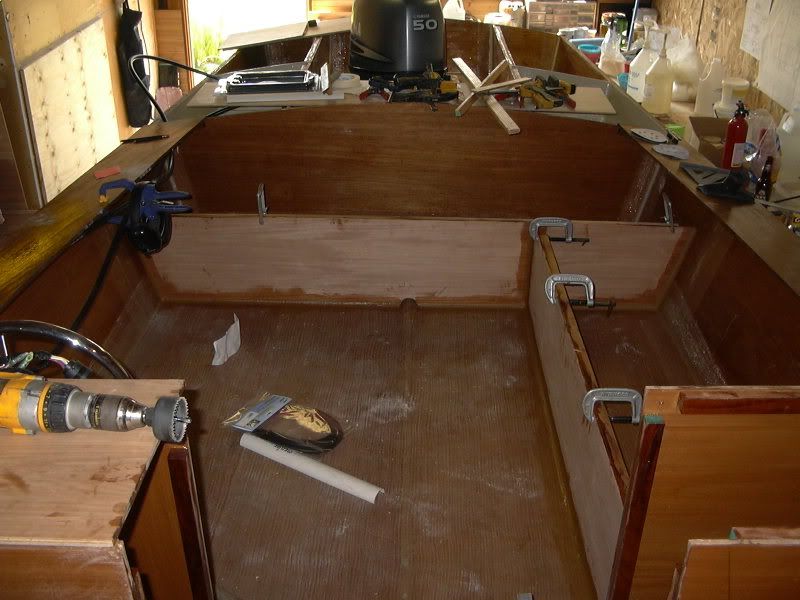
Now its always a mistake to let people see the wood under epoxy as they will beg you to varnish the boat. Only after explaining the time and effort that goes into 25 coats of varnish do they realize why we paint. In the spirit of full disclosure, here are the last photos of the boat in her naked wood state, with 3 coats of epoxy. Note the fairing compound on all surfaces, and a thick coat on the sole which covers the wood:


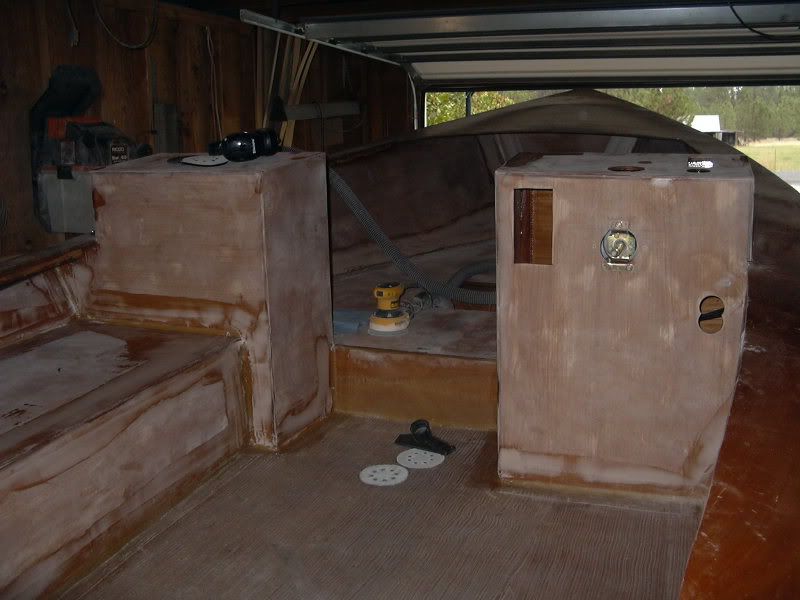
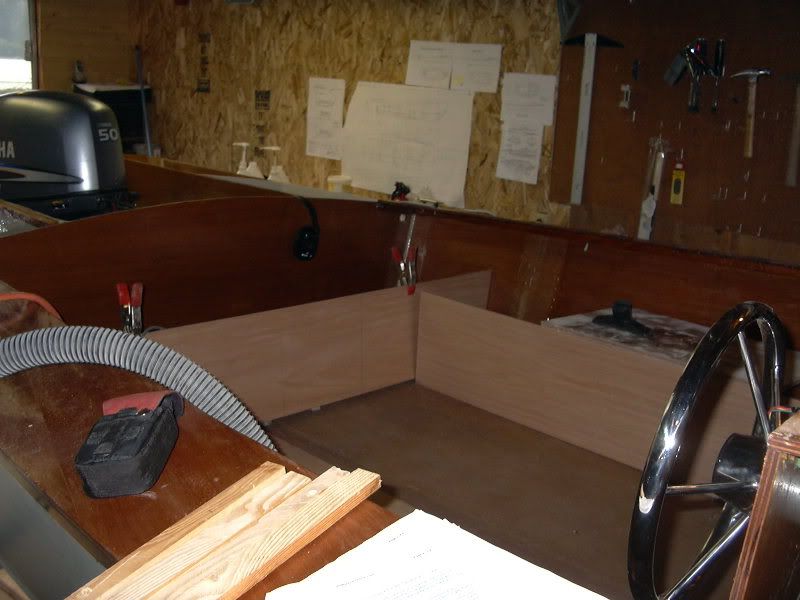
Shes going in for her last sanding, this the finish sanding of 120 grit in prep for paint. Its good enough. If someone sees a flaw and points it out, im okay with that. As of today, we are very near 12 months total in the project. Mind you, much of that is wasted time in ski season, waiting for plywood, and using the boat through the summer heat. Paint will hopefully be next week sometime, or the first week of November. That might require heating the garage in some fashion, but thats a bridge to cross at that point in time.

All comments and feedback are welcome, either here on the blog, or over at forums.bateau2.com

E

10.02.2007

muddling and dawdling

Basically Id be wasting your time posting the daily process, as it goes something like "put on filler, sand off filler, rinse, lather, repeat".

So for a change of pace, I messed with Dave's windshield idea. One of the www.bateau.com forum members went out of his way to design a Duvall-style windshield for me. Nice guy. I tried roughing it in just to see how it would turn out with a little 2x fir and a couple little battens of ply to give shape to where the glass would go.

Here it is!


I think it looks pretty snazzy myself, so it will go forward in real mahogany here shortly. I might even bright finish it, just to prove to people it really is a wood boat.

Other things are eating up a little of my boatbuilding time such as a fishing competition over at www.washingtonlakes.com . The comp requires an o-tay sign, so thats why Im making the hand gesture with all the fish in the photos.

Smallmouth bass:


Perch:


Crappie:


Its a life, but someone has to live it I guess.

E

9.20.2007

Bad form

So the weather has turned here in Spokizzle. What was once a glorious indian summer with 85 degree temps in the middle of September has turned into cloudy drizzle adn 59 degrees. While it is the end of a season, its the beginning of another. Boatbuilding can recommence, and ski season is just around the bend. Not to mention fall fishing!

Occasionally a slip in judgement occurs. Sometimes you catch it soon enough, sometimes, just a little too late:


I had a feeling, but didnt check soon enough. Thats cured System 3 Quickfair, which has remarkable strength in 3 hrs when attached to human hair.

Erstwhile I had begun the fairing process, one which I am growing weary of, as this is a big boat with lots of surface area. Carpet keeps creeping into my head as a salvation to all the sanding and filler application. This is the general process.

First we lay fillets in places we haven't gotten finished yet:


Then we tape!:


Follow that with grinding off the selvage edge that keeps the tape together:


Now lets sand the buggery out of the whole stinkin boat. This step is required as I had done a pretty assy job of putting epoxy on the wood in a hurried attempt to play during the summer weather. It did the job, but it was an extra couple hours of sanding to fix all the drips and hooeys. Not terribly much fun, but at least its finished.


This morning's task was quickfair (though the terribly astute may have already surmised this outcome, my dear Watson).


So currently it is curing. Due to the temps today, I will probably have to let it sit overnight. I plan to also fill the weave on the floor and do an overcoat tomorrow, as it can sit curing over the weekend.

While you are here, lets talk tools. Steering wheel pullers cost money. Alot of money. Renting them works, but is a hassle.

I decided to make my own with what was laying around the shop. All it took was a section of 2x4, longer than the diameter of the wheel, two clamps, and a single large diameter carriage bolt type screw. Drill the appropriate hole for the root of the screw, get good purchase, and drive it in. Be careful not to pull the outer ring off the spokes of the wheel, but in certain circumstances, its plenty strong to get a wheel off of a tapered shaft.


That is all...... For now......

E

9.04.2007

Why Im behind

So one would think you could finish a boat in a reasonable amount of time once the structural components are finished. That person, during a hot Spokane summer, is wrong.

The boat has spent more time being used than being worked on. There are a few good things, such as ironing out some design and implementation issues, and a few bad, such as a little blister in one of my seats due to improper precoating of a horizontal surface. Such is life.

As far as progress, the only thing I have really done of any consequence is add a towing pylon for hauling skiers and wakeboarders. Mind you, she lacks wake of any consequence, but its fun to get out and get wet. Plus we are not annoying people and eroding the shore like most others...

Here, soak in the summertime loveliness! Photos courtesy of Ron Costa.

Out with the neighbors, Sean, Teri, and babies A and B:


This one might tip a few people over. Esp Jacques the designer:


Keeping in mind this boat is designed to go speeds around 12-18mph with 30 hp, this is abnormal. We see speeds, with 5 aboard and one wakeboarder, of 24 mph. 50hp yam 4 stroke is worth its weight in epoxy. That thing is quiet, reliable, and powerful enough to lug all of that around without a complaint.

The tower was put in by laminating 1/2" ply drilled and filled with studs to the keel in the motorwell area, then adding the legs through the decks with pins, while backing the pins up with a LARGE washer on top and a 1/2" ply backer on the bottom. Its stout to say the least, and shows no signs of flex in the boat.

I need to get it done, but we are waiting out the change in the weather.

Upholsterer has the seat pads, should be done this week.

E

8.08.2007

New flibbidy flops

As you, my loyal readers, have been watching this saga, this marathon, this epic, this odyssey of a build (is it an Iliad too?), what you didn't realize is that my flip-flops were wearing out. You see, I have a pair of flops that I wear out and about, the nice flops. I also have the pair with epoxy on them, the shop-flops. I have been waking up for the past couple weeks with sore feet. I decided to get rid of the shop flops. I buy the Teva "Mush" flops, because they are soft, squooshy, and they love my feet in ways inappropriate in Utah. Unfortunately, that also means they wear out faster than a streetbike tire.

I have moved on, we are on to shop-flop pair #2 for this build. I had hoped the build would only last through one pair of flops, but we are not doing that kind of build here. This is a trudge, this is something that requires resolve....

Basically today is just a progress report. We have a big party coming up (Saturday, for those of you in the greater Spokane area, email me or post a comment if you want to attend!), which I had hoped to have the boat finished for. Uhm, nope. So I finished out the decks, the seats, rounded off the sharp edges, and got her ready for another weekend of use while unfinished.

Our photos day include the seats (which photos have been requested by several):


Forward, showing the now-completed consoles, rounded edges, and still unfinished bow seating area:


And the posterior for posterity shot:


As they say in British Columbia:

Beauty, eh?

E

8.05.2007

Water makes it best

You know, work comes to a grinding halt when you vacation.

San Diego is nice. Its beautiful, its interesting, the ocean is warm and the surf is good. We saw some family which was a blast, we played in the surf, and we played some poker. All in all, a good trip to say the least.

This did, however, eat up a week. No sanding was done, no parts were added, nothing changed. As much as I tried, the boat didn't change state, though I had hoped.

So we are back to structural pieces. Lotsa carpentry.

In our last visit, we observed the two long boards creating the seat profile, next, we need structural support. This boat is set up light, so we need to frame it to be strong.

In this shot, you will see the aft seat framing, most notably where a wedge was required. I boofed the cut a bit, but a wedge of scrap epoxied in place did a fantastic job of repairing it:


On the port side, the same was done:


What you don't realize is that I had a pump failure on the last batch. The pump I used for the hardener decided to have a major mishap. The ball check valve in the bottom of the pump became lodged too high, and allowed fluid to drain both directions, halving the amount of hardener I added to the resin.

I literally pulled the frame out by hand, 3 days later.

Moral of the story, have extra pumps on hand.

After the major snafu with the fuel hose, this was boring in comparison. Easy fix, followed by some glassing.

Lastly, the decks needed finishing. The compartments have been painted previously, both aft hatch openings are in place, and all cable/hose routing had been finalized.

Dry fitting of the side hatches, with a 1/16" gap or less:


Once those are placed, the aft panel needed some "manipulation". Im not sure if it was due to the 4 stroke motor, the fact that it's 50hp, or if the lines for the motorwell need to be revisited for more contemporary motors, but the aft edge was not going to work. No room for the motor. I had to get creative.

I cut out a panel to cover the area (twice, mind you. I measured the panel and cut it out to a measurement across the transom. The boat is beamier forward. Im an ass.) and laid it up in a dry fit. Measurements were pulled off the motor in various states of trim to find an appropriate gap. Once the gap was finalized length wise, I cut an inspection hole shape right at the motor.


This allowed me to measure the radius of the arc of the engine. Laying that down on the panel, then stretching it so that it hits the edges of the stringers/motorwell sides, I cut the arc, and laid it back on top for another dry fit:


Alright, lets glue:


I then prepped and cut seat tops out of scrap 6mm ply. Light, but I think it'll be strong enough. No pictures please, no pictures.

I do have a little beef, there is a monster gap from the front of the motor to the E frame. This will have to be filled somehow, and might need to be addressed in the plans. Im thinking of a removeable, drop in cover that sits on battens. Not sure yet, still working it out.

We have a big party on the 11th, to which the boat needs to be really close to completion. Im thinking her official launch will be that day, we are still working out the particulars. It won't be done, but it'll be close.

Any questions? Comments? Let me know!

E

7.22.2007

A place to sit.

In light of the marathon read of the last post, I will keep this one a bit more to the point...

Im sure we all remember the tank fiasco. It was a depressing foray into the doldrums, a realization that major screwups happen. Here is proof that even a major bonehead move will not stop your project.

All that needed to happen was a quick run down to the House of Hose (yes, that really is the name of the joint), pick up ANOTHER $40 filler hose, bring it home, and get to work. One of the benefits of a boat that gets paint instead of varnish is the ability to fix problems without taddletale lines. A little filler goes a long way to protecting your boatbuilding ego.

I got out the saber saw, snapped the blade in half to prevent myself from cutting into the tank or any of the hoses below, drew some lines estimating where the hose fittings were, rounded off the corners with a pop can and a pencil, and went to town. A whopping 20 minutes later, the problem was solved, and we were back in business!


As I would be doing some epoxy and fiberglass work on the seats, I had some extra filler mixed up and just put the little bugger back together later on the next day. Eazy peazy.

While I had the fuel system on the mind, I remembered that due to the location of the fuel vent, and the lack of spray rails on this boat, I had a fair amount of water coming through the vent. To remedy this, I read a few pages, and figured out that I either needed a $30 p-trap type fuel system attachment, or I could just run a loop in the boat and protect it with gravity.


Done and done!

Hell, we are on a roll, lets do some other projects.

Another little project that needed doing was to precoat the compartments with paint before I close them up. The compartments are rather hard to paint through a hatch, so I decided to slob on a bit of paint while I had full days to work. The color is Grand Banks beige, which I find to have a bit of green in it. Love the color, used it in the rowboat with great results.


All the projects are moving fast, so I got into something a bit more involved. I planned on doing the seats per plan, but after using the boat a bit, I changed my mind and did the following mods: lengthened the port side bench to the console, thus it can be used as a lounge, ran the full back bench with a very small amount of added depth, and completely omitted the starboard bench. This gives the boat a more open feel, and gives a working railing for landing fish, hauling pots, getting into and out of the boat, and helps to trim the boat when Im alone.

First we rough everything in, getting a feel for what it will do:


Now that it is all set, we need to find a way to brace it in place so things don't move around while the epoxy cures. I like clamps with any scrap stock, moved around until the tape measure likes it:


Voila!


A little fiberglass tape and some epoxy precoating, and presto, we have seat boxes:


At this point, I had a shift of work to do, so I finished it out as best I could to use in the water. There are seat braces for each box, 2 per seat unit, to support weight and divide storage areas up. Mainly I wanted sturdy, sag free seats, but also wanted to use some of the 6mm plywood scrap as seats. Waste not....

It was toasty this weekend (94-96F), so she went back in the drink to test out the fuel system, the new trim angles afforded with the trim pin moved, a little ballasting change with 15 gals of fuel in it, and swimming. Everything worked flawlessly.

My lovely bride went with me (although I don't think she was terribly enthused, she was willing to humor me with a smile) to take a few pictures for my loyal readers. I decided to get some moving shots at different speeds to give you all (and Jacques) an idea of the boat and trim. Keep in mind Im not a small kid (6'3") so the boat looks a little smaller than it really is.

12 mph:


16:


22:


28:


As you can see, this boat trims out much differently than most, with that high bow carried proudly. This is all as a light boat, only 200 lb of passenger, so she carries too much of the boat out of the water. All speeds are gps. I typically can't keep occupants out of the front seats, so she keeps that sharp entry in the drink most of the time. Did I mention its only supposed to go 18 mph?

Short hiatus for some family doings in San Diego, but I will be back at it very soon.


E