San Diego is nice. Its beautiful, its interesting, the ocean is warm and the surf is good. We saw some family which was a blast, we played in the surf, and we played some poker. All in all, a good trip to say the least.
This did, however, eat up a week. No sanding was done, no parts were added, nothing changed. As much as I tried, the boat didn't change state, though I had hoped.
So we are back to structural pieces. Lotsa carpentry.
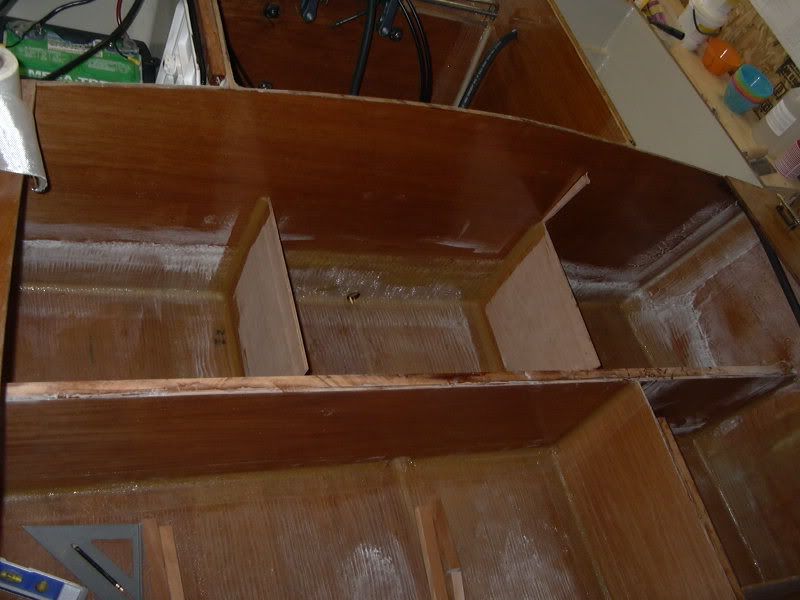
In our last visit, we observed the two long boards creating the seat profile, next, we need structural support. This boat is set up light, so we need to frame it to be strong.
In this shot, you will see the aft seat framing, most notably where a wedge was required. I boofed the cut a bit, but a wedge of scrap epoxied in place did a fantastic job of repairing it:
On the port side, the same was done:
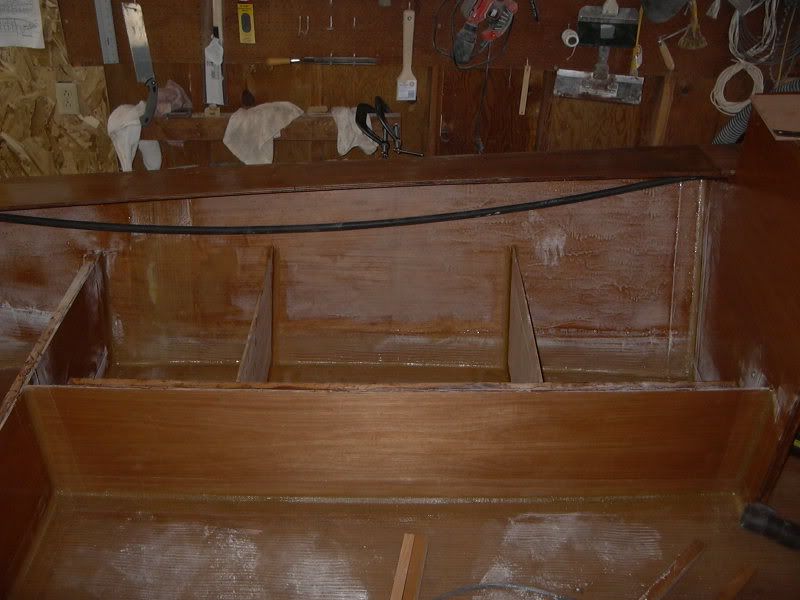
What you don't realize is that I had a pump failure on the last batch. The pump I used for the hardener decided to have a major mishap. The ball check valve in the bottom of the pump became lodged too high, and allowed fluid to drain both directions, halving the amount of hardener I added to the resin.
I literally pulled the frame out by hand, 3 days later.
Moral of the story, have extra pumps on hand.
After the major snafu with the fuel hose, this was boring in comparison. Easy fix, followed by some glassing.
Lastly, the decks needed finishing. The compartments have been painted previously, both aft hatch openings are in place, and all cable/hose routing had been finalized.
Dry fitting of the side hatches, with a 1/16" gap or less:
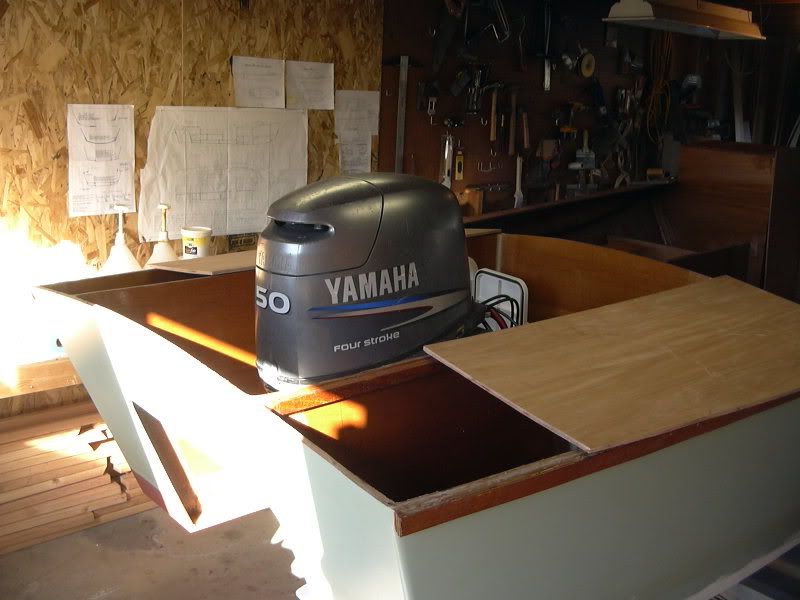
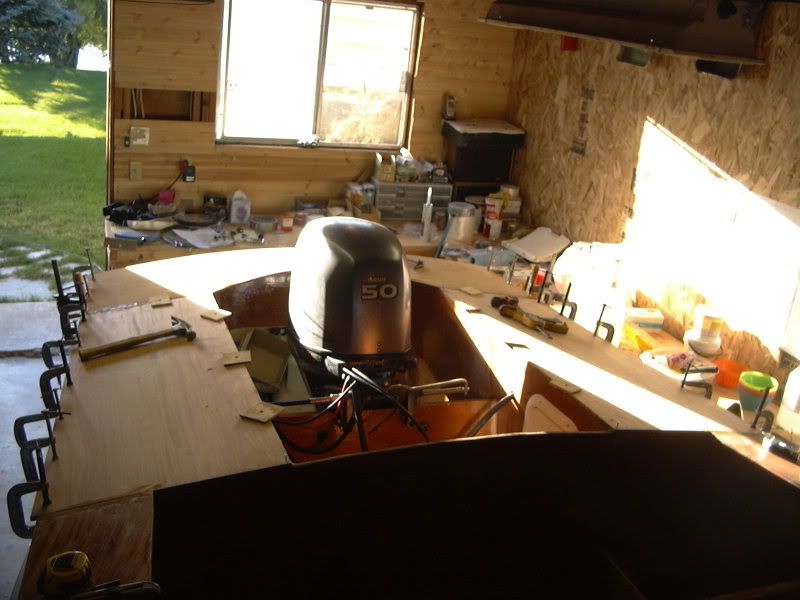
Once those are placed, the aft panel needed some "manipulation". Im not sure if it was due to the 4 stroke motor, the fact that it's 50hp, or if the lines for the motorwell need to be revisited for more contemporary motors, but the aft edge was not going to work. No room for the motor. I had to get creative.
I cut out a panel to cover the area (twice, mind you. I measured the panel and cut it out to a measurement across the transom. The boat is beamier forward. Im an ass.) and laid it up in a dry fit. Measurements were pulled off the motor in various states of trim to find an appropriate gap. Once the gap was finalized length wise, I cut an inspection hole shape right at the motor.

This allowed me to measure the radius of the arc of the engine. Laying that down on the panel, then stretching it so that it hits the edges of the stringers/motorwell sides, I cut the arc, and laid it back on top for another dry fit:
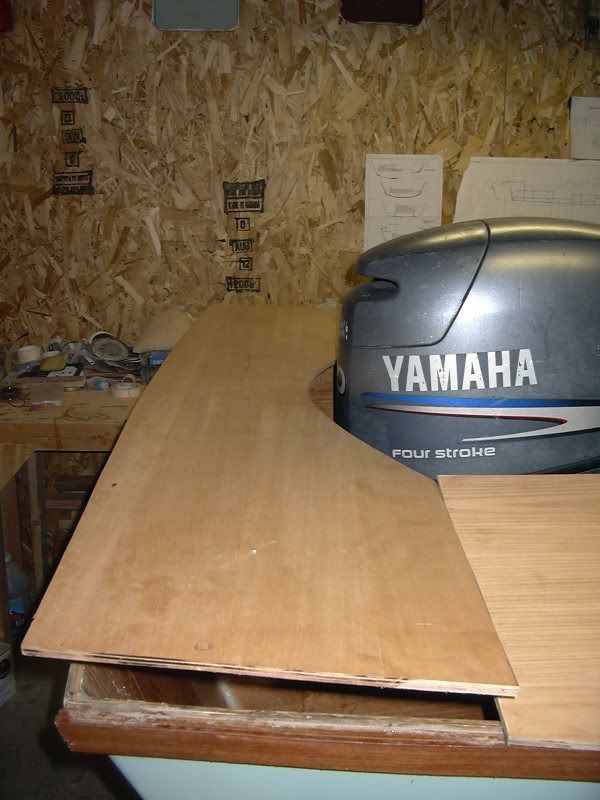
Alright, lets glue:
I then prepped and cut seat tops out of scrap 6mm ply. Light, but I think it'll be strong enough. No pictures please, no pictures.
I do have a little beef, there is a monster gap from the front of the motor to the E frame. This will have to be filled somehow, and might need to be addressed in the plans. Im thinking of a removeable, drop in cover that sits on battens. Not sure yet, still working it out.
We have a big party on the 11th, to which the boat needs to be really close to completion. Im thinking her official launch will be that day, we are still working out the particulars. It won't be done, but it'll be close.
Any questions? Comments? Let me know!
E

2 comments:
Do you think the big gap in front of the engine is way more than you need when the enginge is in full tilt?
I'm thinking of building to the alternate plans where the cockpit goes all the way back to the transom. Could use a little more fishing room . . .
I think that the big gap in front of the motor created two good sized storage compartments that, when sealed, form a decent amount of flotation. They also better define the motorwell area and isolate the motor from the passenger area.
Secondly, I do get some slop over the transom when the motor is turned full lock. This would have to be tolerated as water splashing across the sole area. Its all in what you want, but the boat is surprisingly roomy as-is for fishing.
E
Post a Comment