5.09.2008
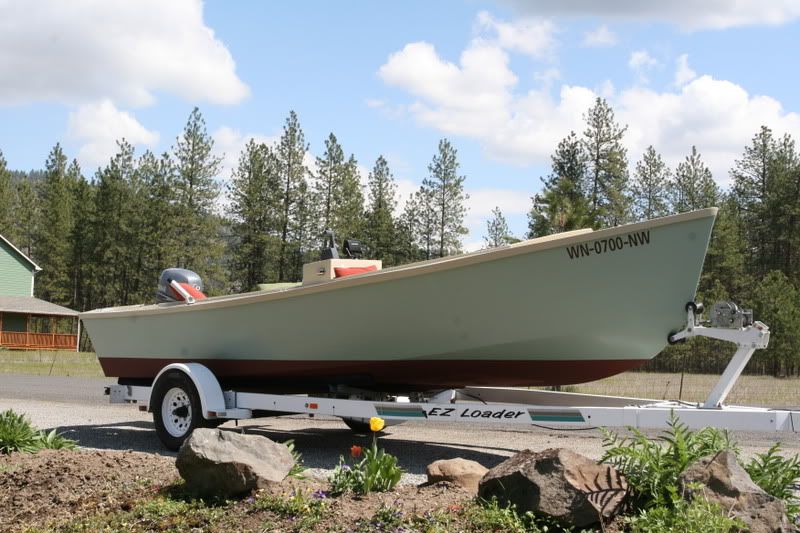
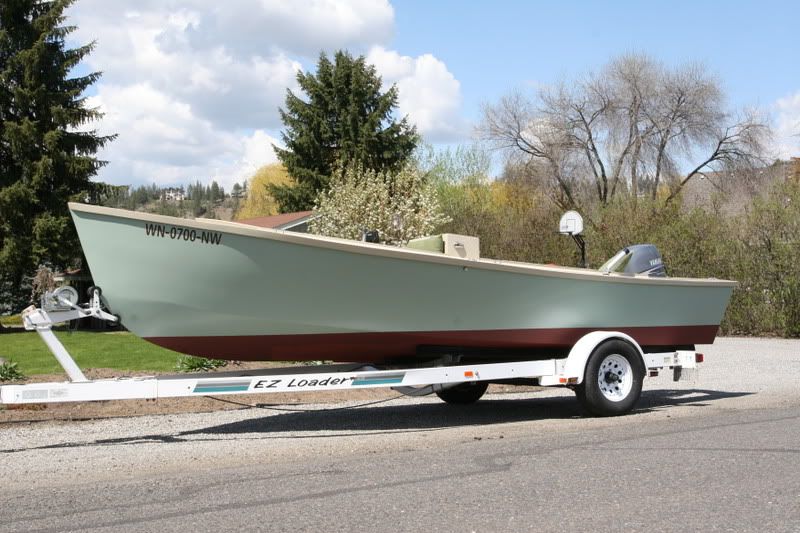
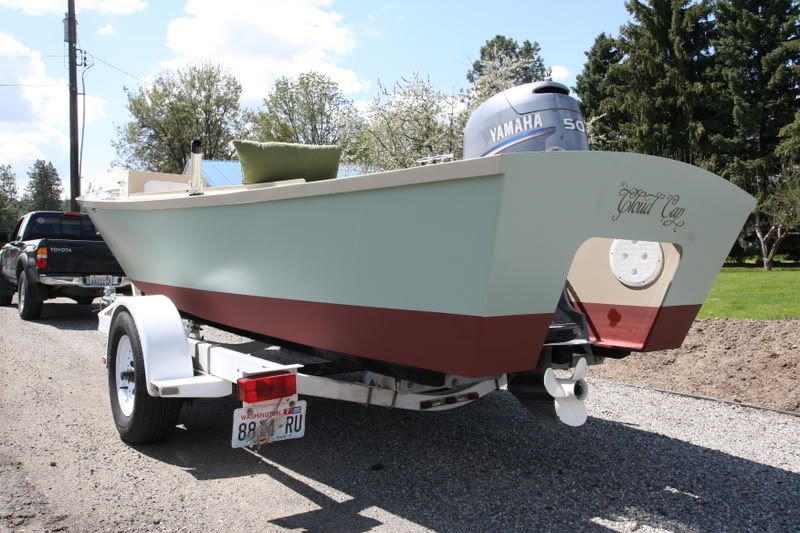
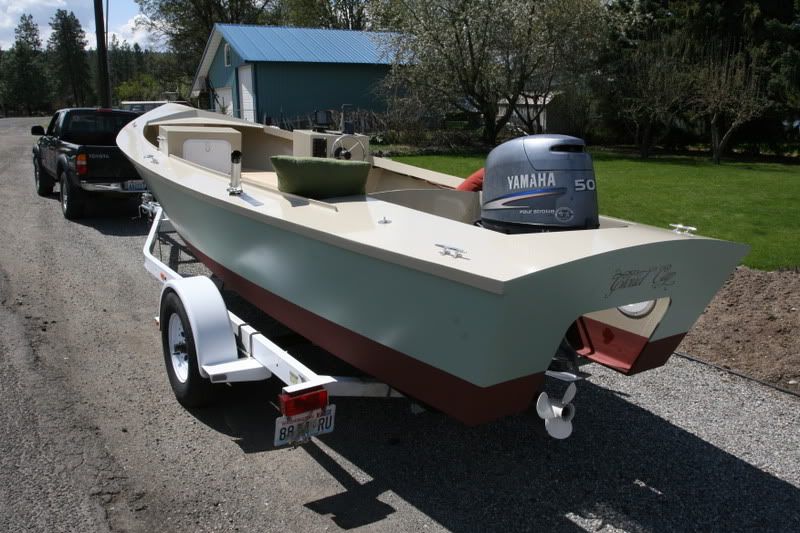
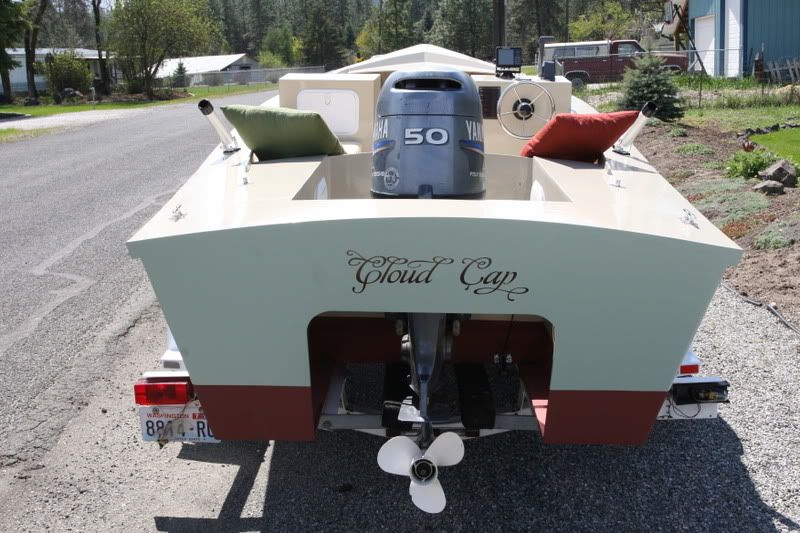
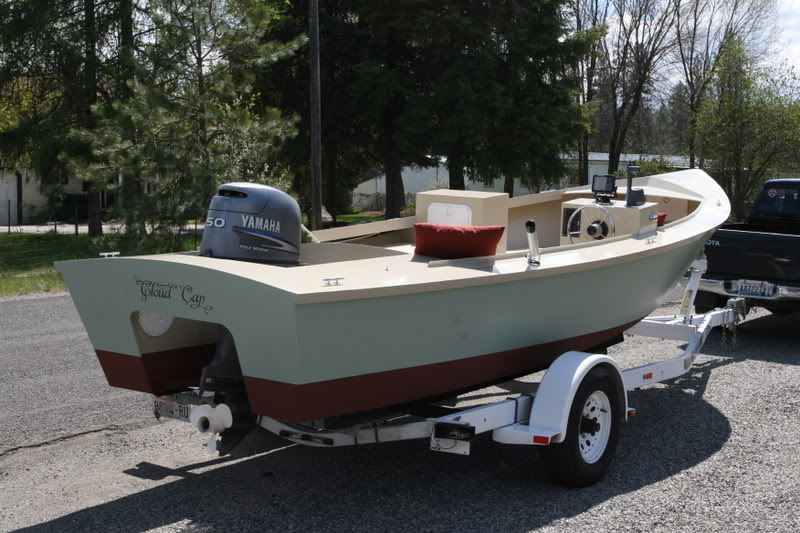
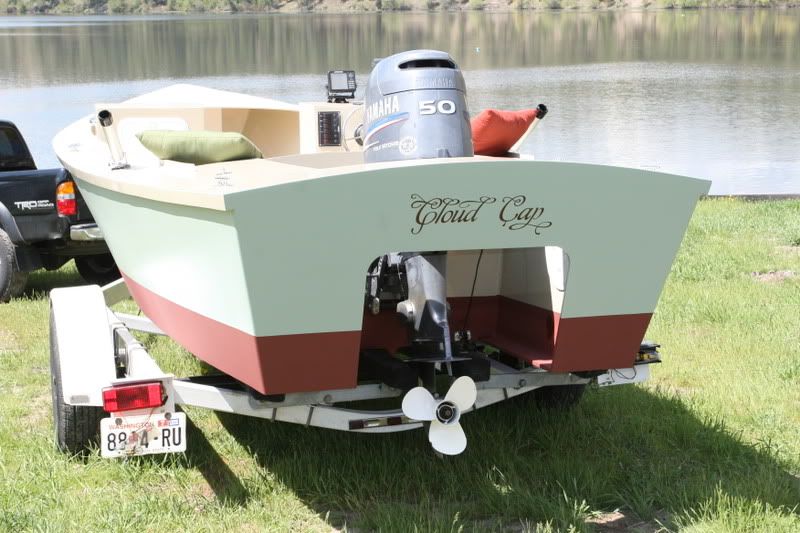
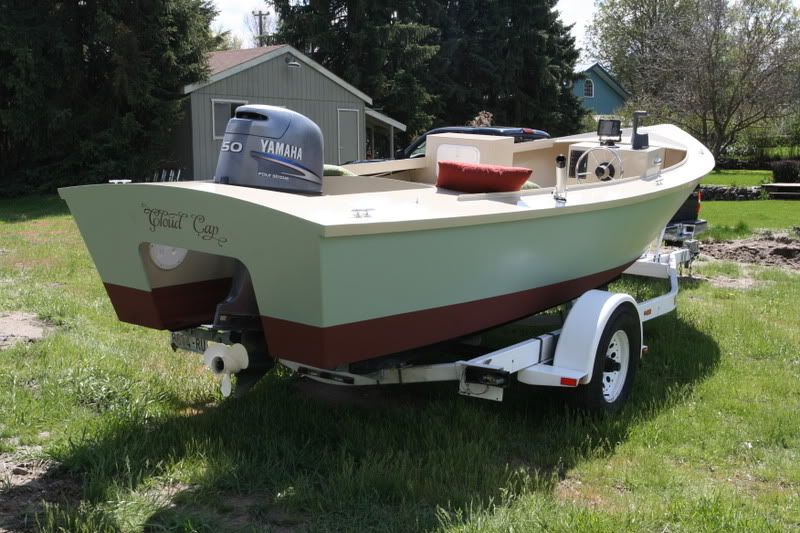
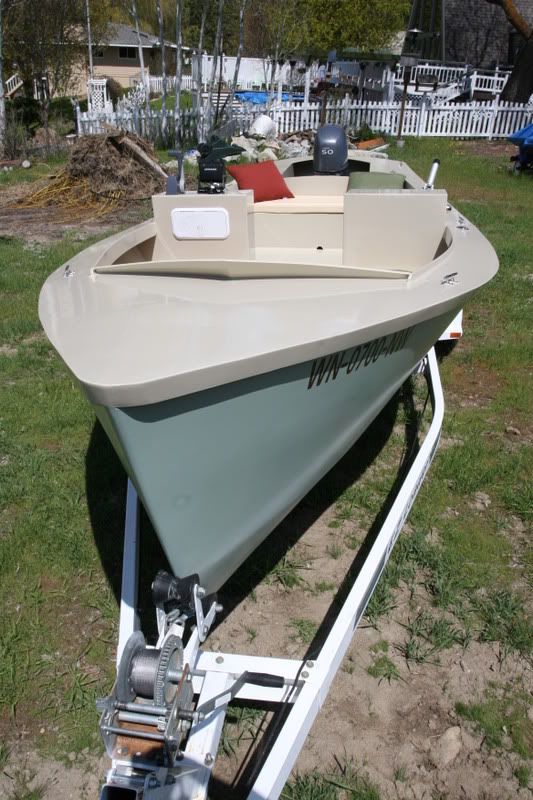
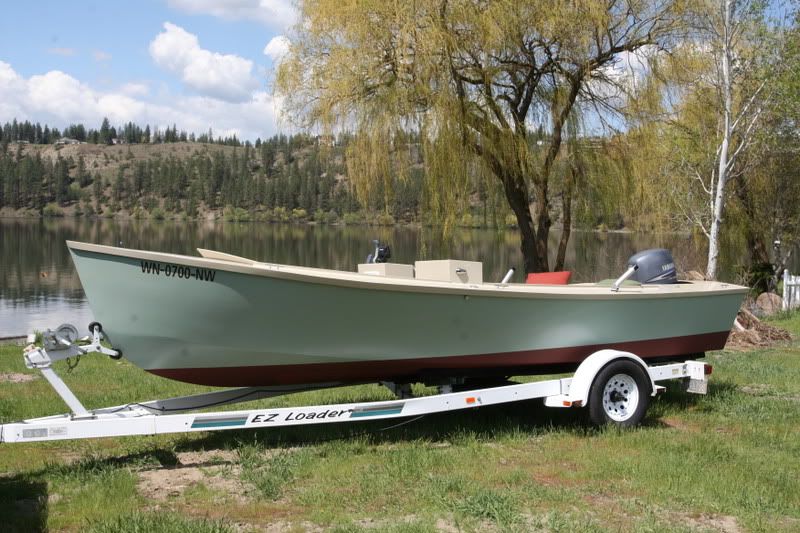
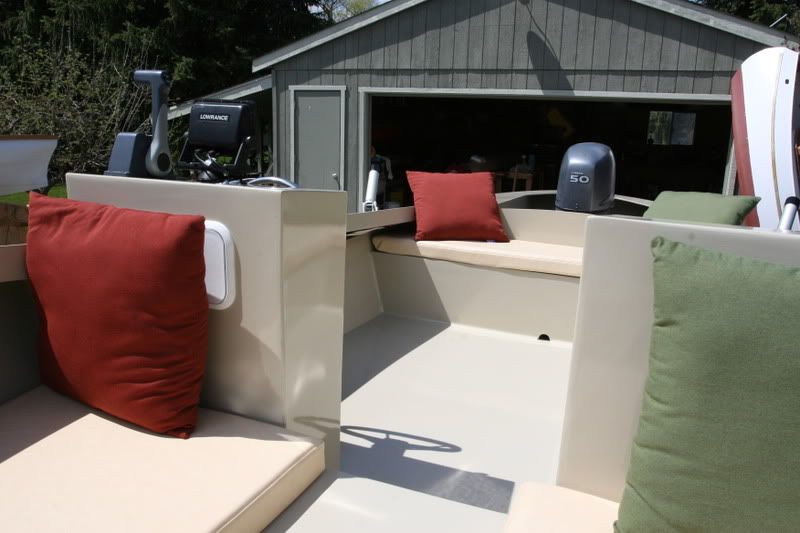
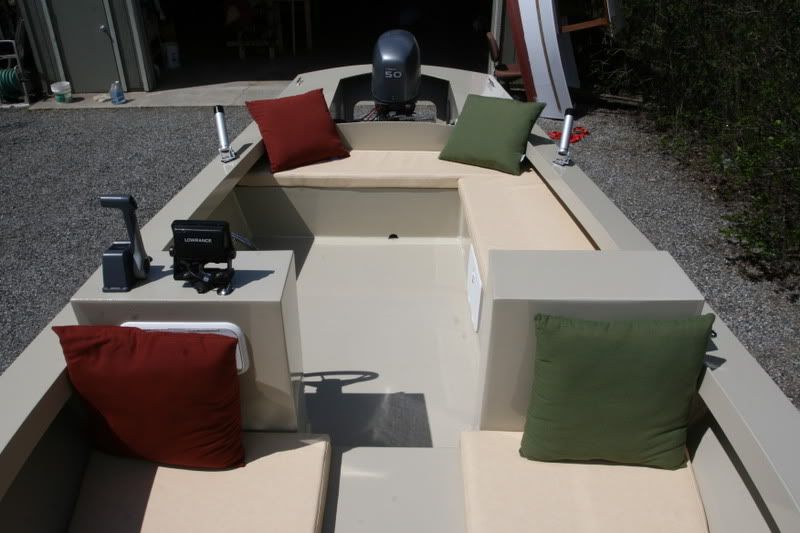
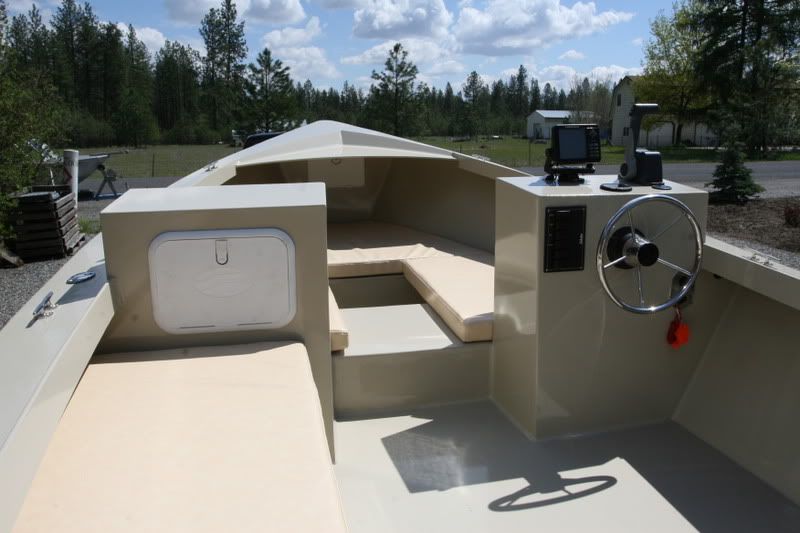
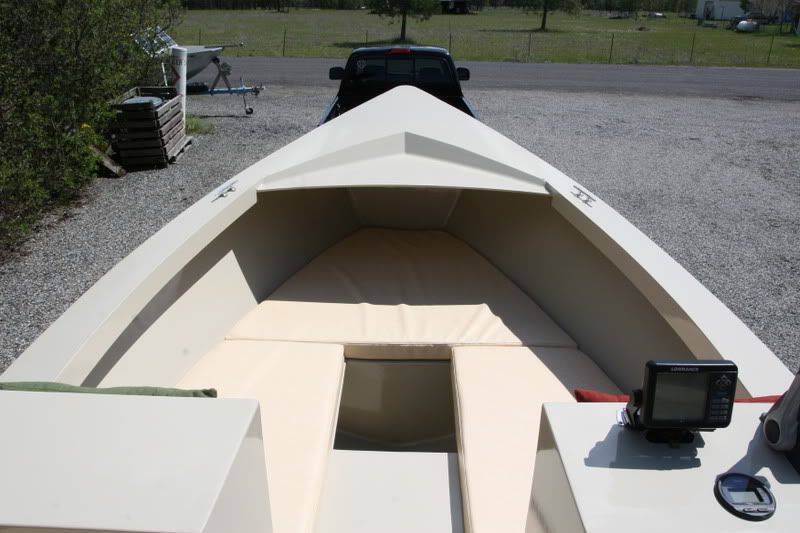
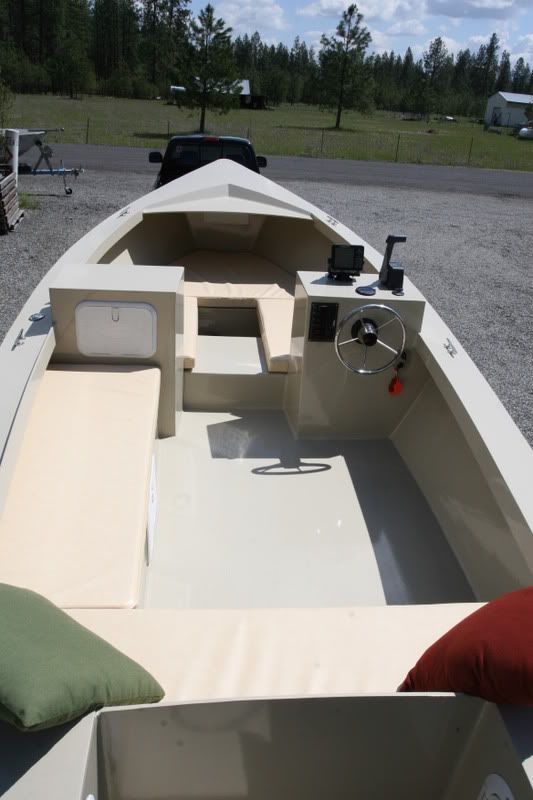
Allow me to introduce CLOUD CAP
Ladies and Gents, here she is!
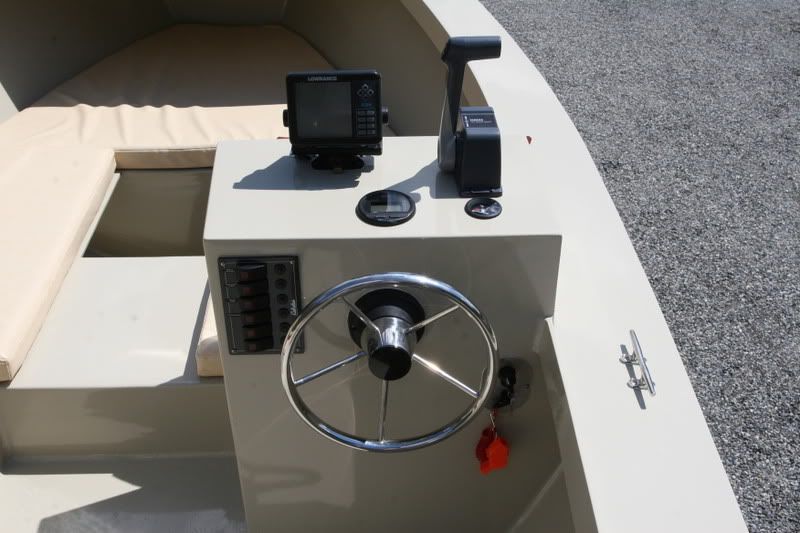
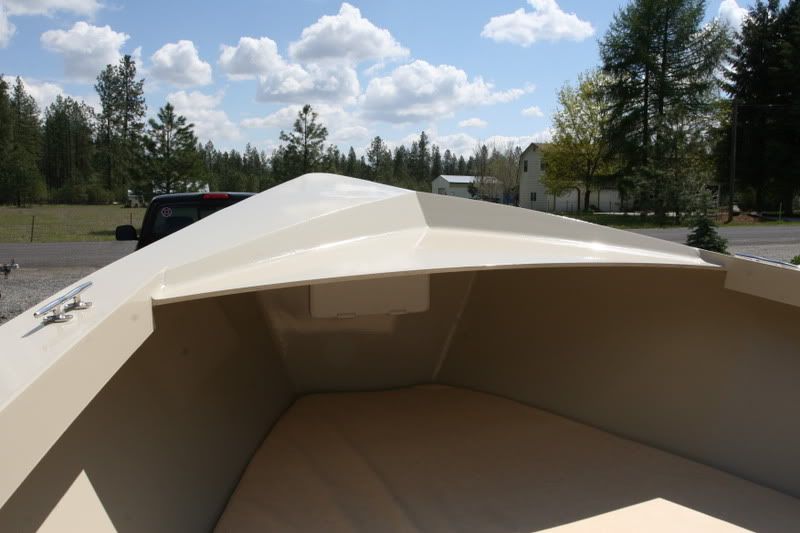
I have slowed on posting for two reasons; one is that my camera has degraded to the point that it will only take one round of photos (maybe up to 10) before it decides that the AA batteries are dead, second is that I can't imagine people being too terribly excited about "hey, this is the third coat of paint, which looks just like the first and second!". Since our last good visit, she has received a handful of interior coats of Interlux Brightsides in Grand Banks beige, a final coat of red Bottompro gold, and a last coat of the beautiful Kirby paints' Grey Green.
After the administration of the smelly colored stuff, I went back through and assembled each part with a loving dollop of 3M bedding compound in each screw hole and anywhere a piece of metal touched the boat. In a few places I switched to 4200 fast dry where I thought it might be best for the compound to cure up in less than three weeks.
I am welcoming any questions via the comments section, or the forum at forums.bateau2.com in the LB22 thread. To keep from babbling on and on, Im going to just post MANY pictures of her, and let you decide!
She will be unceremoniously splashed either tonight (Friday May 9th, 2008) or tomorrow morning. She is registered at Jamestown distributors and boatbuildercentral.com. She requests that all information remain public and that you share the photos of her with your friends anytime you like.
I have succeeded at hitting my target of completing her before June, I just missed it by a year is all......
E
5.06.2008
5.05.2008
Big happenings are afoot
Stay tuned, check back often, there will be a major post coming very, very soon.
E
E
3.24.2008
I quit!
I have quit.
Im done with all of the prep work, detail work, and general BS related to getting ready for paint. What a pain, dealing with the cold all winter long (one of the longest in memory here in Spokane). We have had flirtatious days of 55 degrees, only to be dealt a crushing blow of 7 days below 45 degrees and regular overnight snowfall. It melts during the day, only to come back and assault us yet again overnight.
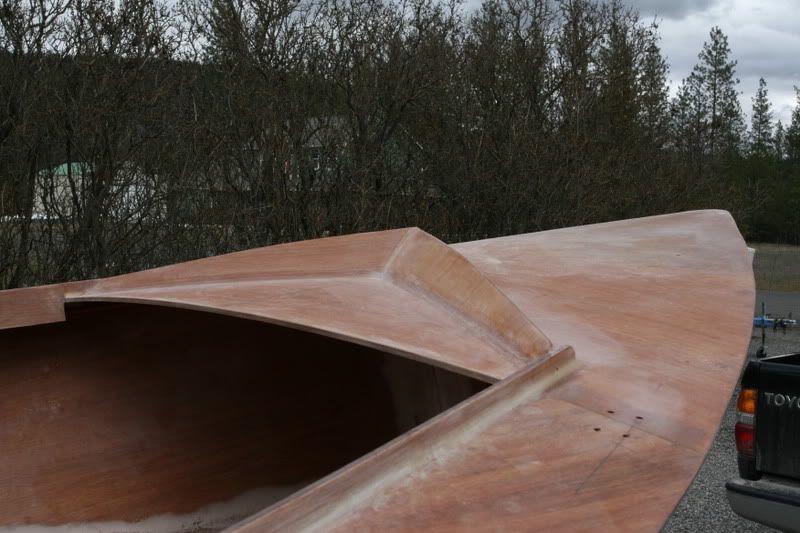
Good news is, the last of the epoxy work was completed, and the splashboards on the bow are done! This was by far the most difficult fillet I have ever dealt with, being not only small, but delicate and difficult to get to thanks to the angles. It did turn out well, however.
After getting the splashboards up, set, glued, and filleted, I did one last detail sanding of various parts, then a nice long bath to get all the wintertime blush off. The fast and medium hardeners the epoxy needs sheds a blush when it cures, which is water soluble. This required a sponge scrub of the entire boat with mild detergent and a 3M pad. Afterwards, she turned out to be very clean and smooth, which was nice. It does, however, have what my friend Jerry refers to as "scobies" on it. These are the little balls of sanding dust and junk that have settled over time and made the boat a little "hairy" feeling. I think this week (since it is STILL too cold to paint) I might have to go out and give her a once over with the 220 grit, just to peel the scobies off and make it 100% buttery smooth for the paint.
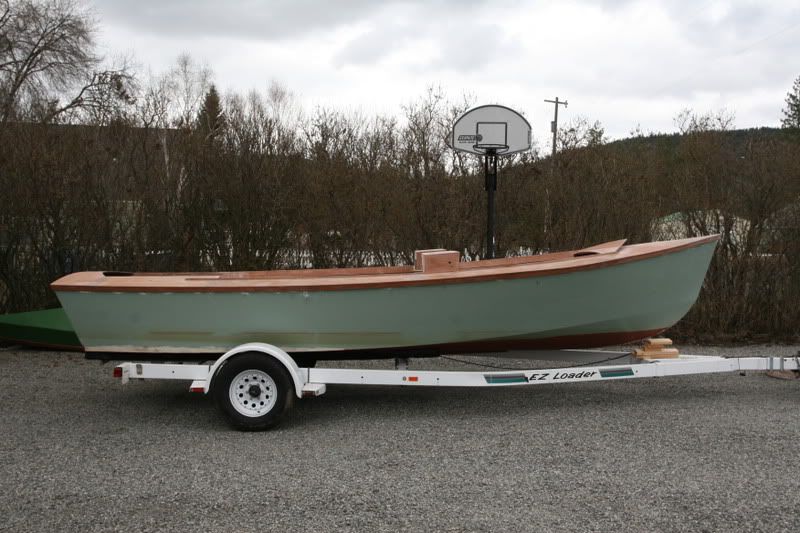
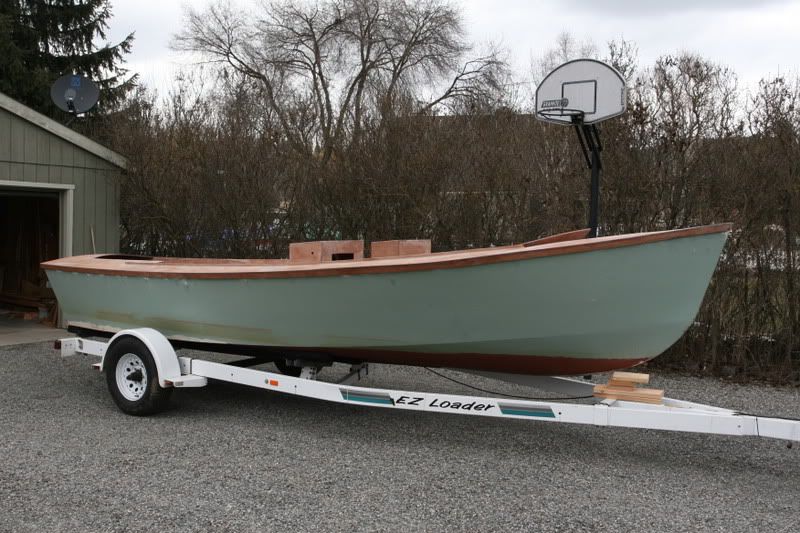
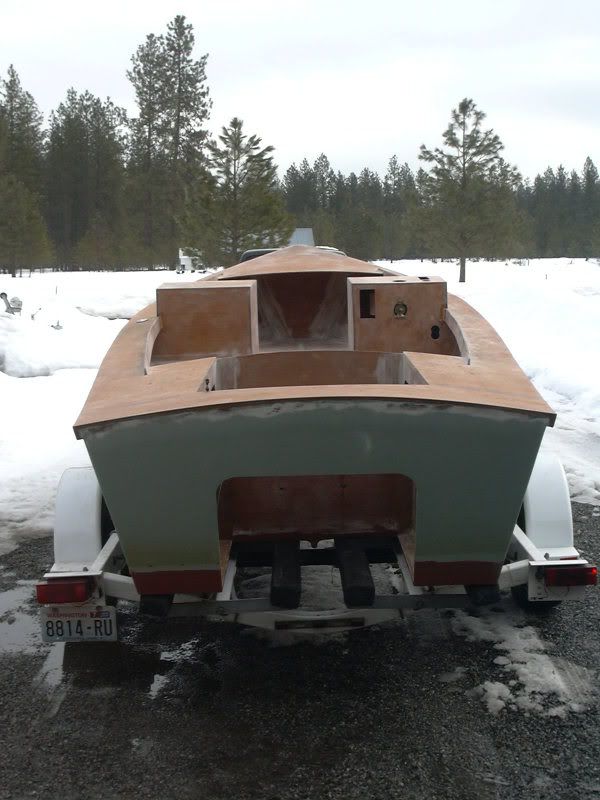
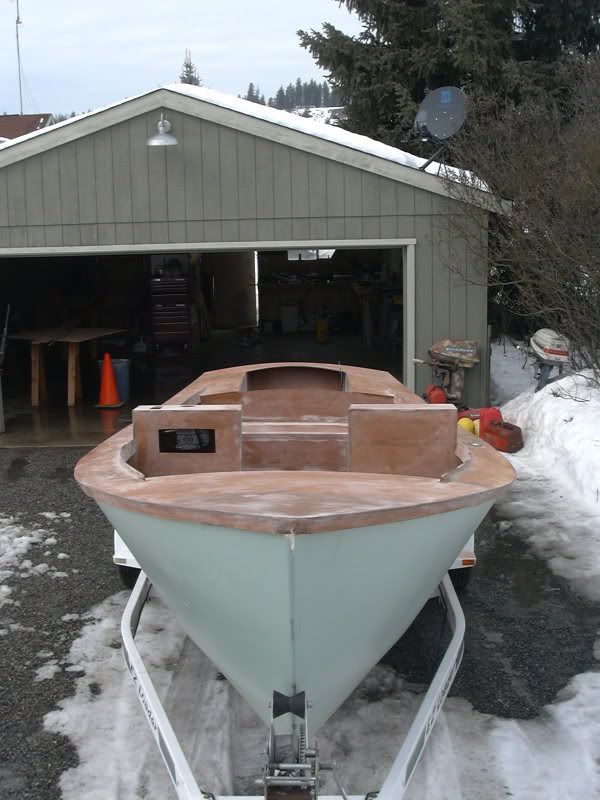
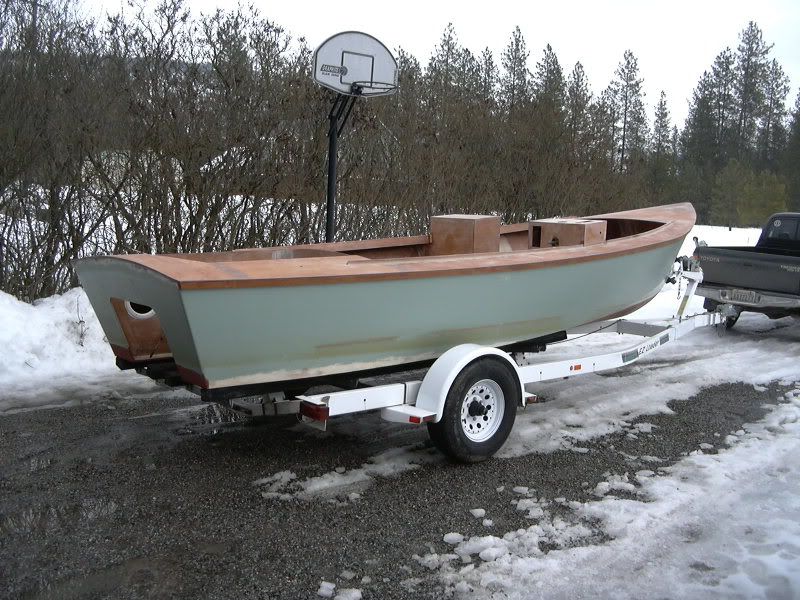
Without further ado, here she is, ready for paint:
A sidelong glance:
Quartering shot to show the finished splashboards:
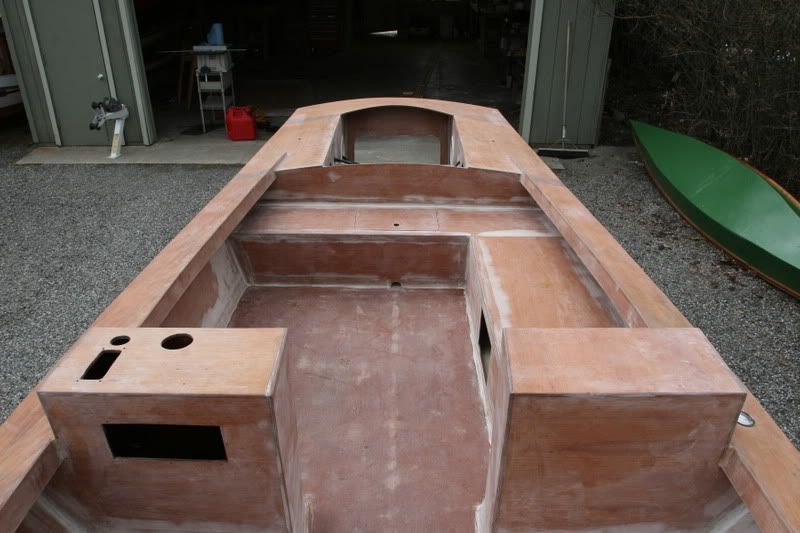
I had SWMBO's camera, with the big wide angle lens, so I shot some interior photos for the LB22 builders that might happen along after me, looking for ideas on how to do their aft seating and forward bulkheads:
Here is the finished splashboard:
I chose to run it inside the coamings so that the visual line of the coamings was uninterrupted. Obviously these splashboards are only going to be good for spray and rain, as a good sized wave will laugh at it just as it drenches the occupants of the boat. I did add some drain holes in the small pockets so they dont retain water and dirt. I think she gets a nice 40's flair from it, a very lean look. The windshield as-designed took away the armrests on the decks that SWMBO loved, so I chose not to add Jacques' windshield. Im always open to comments and ideas as well.
I have many more photos (including ones where I had sanded all of the lake scunge (a friend of mine's coined term for the green slime on the sides of our boats), if anyone is interested.
Now if it would only get over 60 so I could paint this thing.....
E
2.28.2008
2008 boatbuilding season commences!
The weather has finally reached an epoxy-able stage (only cooling to 33 tonight!), so we are off like a turd of hurdles (herd of turtles?)
I had been stagnating at the thought of cutting more holes in the poor boat. The hole cutting isn't too much of an issue, as after so much fairing and fairing and sanding with some fairing, I essentially despise my boat. Devlin says you need to hate a boat, well, deal.
The bow bulkhead (frame A) is supposed to be trimmed completely open based on the design, but I saw this as an opportunity for a storage compartment with a lid. This was also fueled when the initial plywood order over a year and a half ago was the wrong thickness. The A frame ended up being 6mm instead of the requisite 9mm, so the designer helped me fix the scantlings and utilize the frame I had. Today, we poked a hole in it:
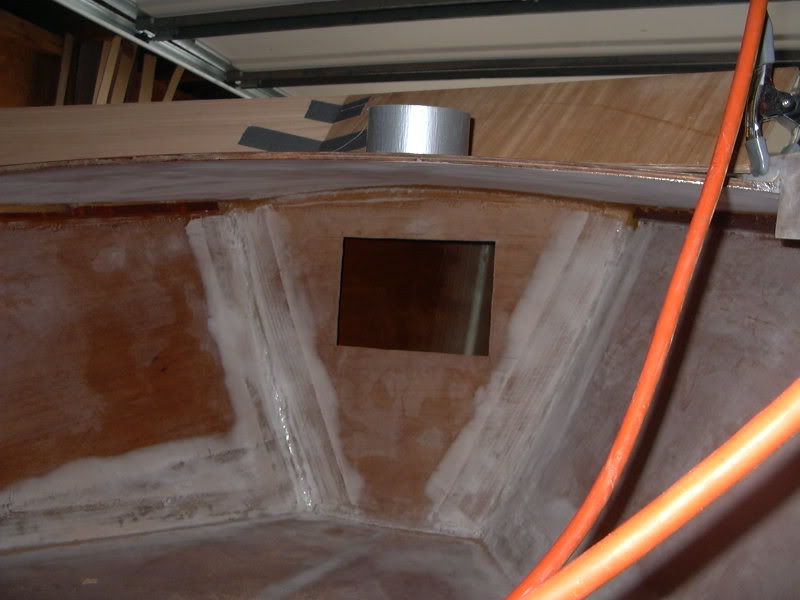
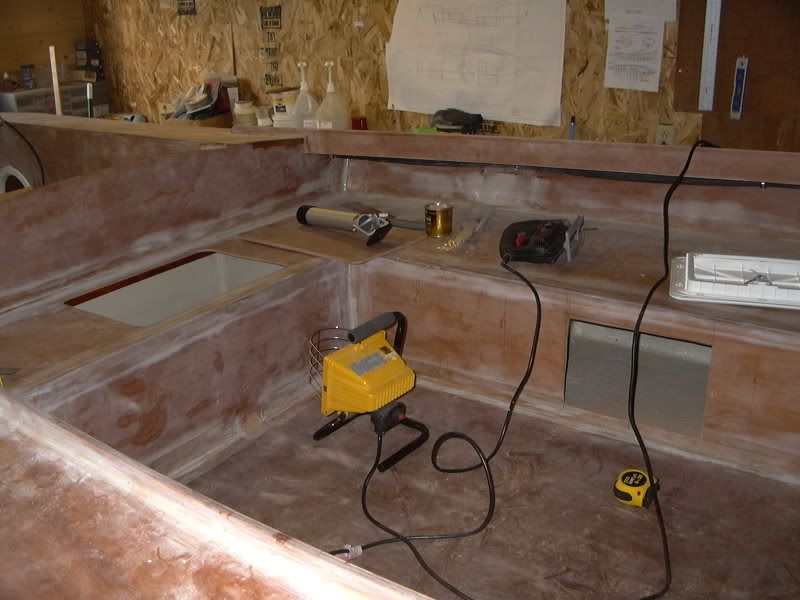
Whilst feeling a little saw happy, the benches were just flotation tanks until this point, so I had the same festivities with those as well. The side seat is non-draining and sealed, so it received a vertical locking hatch, allowing some storage of sundry items (probably the keys/cellphone/wallet/dry stuff compartment). On the other hand, the aft compartment will have a drop-in hatch made from its own cutout. This compartment is the main drain to the bilge well aft. Obviously this isn't an offshore boat, otherwise large 1000gph ports would be cut into the sides. The bulk of its life will be spent in freshwater lakes and occasional excursions to the Puget Sound / San Juan islands, which are essentially overgrown lakes with a bad attitude on windy days. Do note that I painted these compartments EEONS ago:
There are other additions, such as the bow eye holes were drilled and an 8" long 1x1 mahogany wood backer glued in, so we will have a true bow eye and the ability to attach her to the trailer, a novelty in itself. I didn't take a picture.
My largest concern since about September is how I was going to do the windshield. I have wavered from Jacques' intended design of a Bolger-inspired sloped windshield forward with side windows (axed due to losing the armrest in SWMBO's seat), to nothing at all, to a Chris Craft looking Duvall style windshield. After much meditation (mainly on the toilet), and considering the costs associated with a CC windshield (from $450-$2000), I opted to step back in time.
Back in the 30's and 40's, many of the utility boats with this hull shape and open layout just used coamings of various types. Some rounded, some sloped, some shaped in odd and majestic ways. I opted for the saxboard/splashboard look of the ocean going vessels. This gives a dose of protection if a green wave is shipped over the bow (which will never happen), has a very jaunty look, and was relatively easy to do with scrap on hand. I am looking for comments on this, good or bad. Any forumites please post in the forums, otherwise feel free to throw a comment in here at the blog.
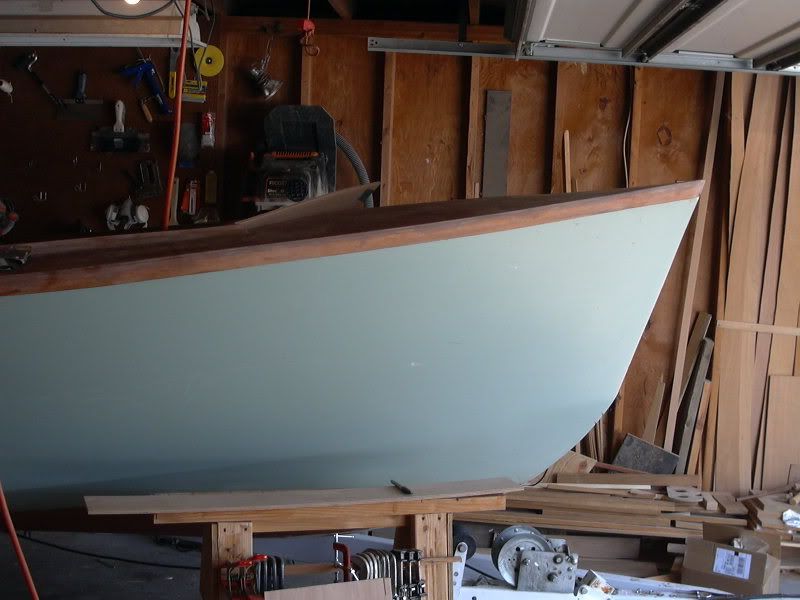
I think it's simple, understated, and cost effective. I couldn't justify putting a windshield up front that wasn't going to block any wind of consequence, as the forward seats get no breeze, and when I stand I get a face full of bugs on the way in regardless. For our needs, where being out in the sun is King, I think this will work out well.
Next up is finishing out the splashboard fillets, and getting her ready for paint!
I will have to wait a bit for paint, but once 60 degrees rolls around, we are going full tilt, paint, cure a week, and then add the lights/wiring/engine/controls.
Ahh, its nice to be moving again!
E
I had been stagnating at the thought of cutting more holes in the poor boat. The hole cutting isn't too much of an issue, as after so much fairing and fairing and sanding with some fairing, I essentially despise my boat. Devlin says you need to hate a boat, well, deal.
The bow bulkhead (frame A) is supposed to be trimmed completely open based on the design, but I saw this as an opportunity for a storage compartment with a lid. This was also fueled when the initial plywood order over a year and a half ago was the wrong thickness. The A frame ended up being 6mm instead of the requisite 9mm, so the designer helped me fix the scantlings and utilize the frame I had. Today, we poked a hole in it:
Whilst feeling a little saw happy, the benches were just flotation tanks until this point, so I had the same festivities with those as well. The side seat is non-draining and sealed, so it received a vertical locking hatch, allowing some storage of sundry items (probably the keys/cellphone/wallet/dry stuff compartment). On the other hand, the aft compartment will have a drop-in hatch made from its own cutout. This compartment is the main drain to the bilge well aft. Obviously this isn't an offshore boat, otherwise large 1000gph ports would be cut into the sides. The bulk of its life will be spent in freshwater lakes and occasional excursions to the Puget Sound / San Juan islands, which are essentially overgrown lakes with a bad attitude on windy days. Do note that I painted these compartments EEONS ago:
There are other additions, such as the bow eye holes were drilled and an 8" long 1x1 mahogany wood backer glued in, so we will have a true bow eye and the ability to attach her to the trailer, a novelty in itself. I didn't take a picture.
My largest concern since about September is how I was going to do the windshield. I have wavered from Jacques' intended design of a Bolger-inspired sloped windshield forward with side windows (axed due to losing the armrest in SWMBO's seat), to nothing at all, to a Chris Craft looking Duvall style windshield. After much meditation (mainly on the toilet), and considering the costs associated with a CC windshield (from $450-$2000), I opted to step back in time.
Back in the 30's and 40's, many of the utility boats with this hull shape and open layout just used coamings of various types. Some rounded, some sloped, some shaped in odd and majestic ways. I opted for the saxboard/splashboard look of the ocean going vessels. This gives a dose of protection if a green wave is shipped over the bow (which will never happen), has a very jaunty look, and was relatively easy to do with scrap on hand. I am looking for comments on this, good or bad. Any forumites please post in the forums, otherwise feel free to throw a comment in here at the blog.
I think it's simple, understated, and cost effective. I couldn't justify putting a windshield up front that wasn't going to block any wind of consequence, as the forward seats get no breeze, and when I stand I get a face full of bugs on the way in regardless. For our needs, where being out in the sun is King, I think this will work out well.
Next up is finishing out the splashboard fillets, and getting her ready for paint!
I will have to wait a bit for paint, but once 60 degrees rolls around, we are going full tilt, paint, cure a week, and then add the lights/wiring/engine/controls.
Ahh, its nice to be moving again!
E
2.14.2008
We are up to 40!
Ahh, the weather is starting to break.
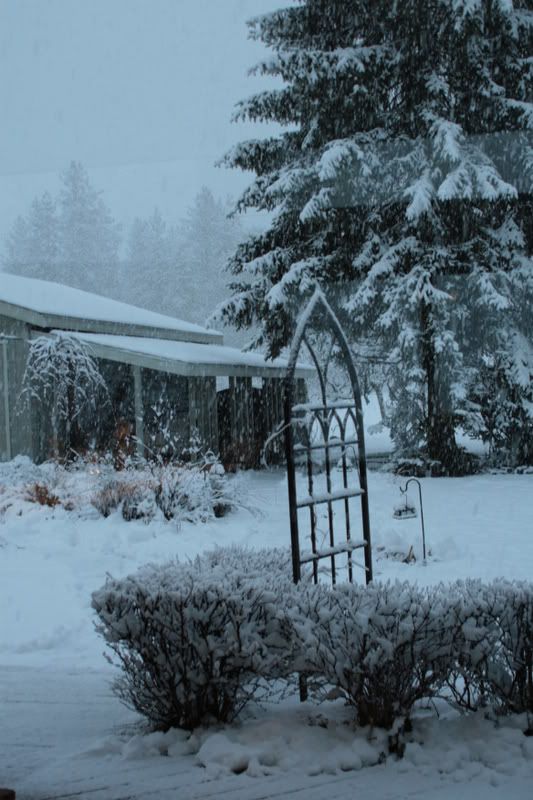
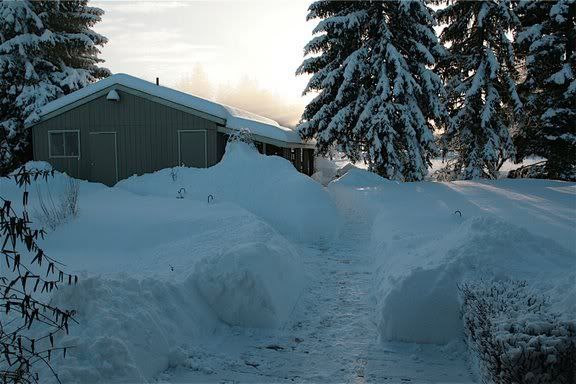
Its been an exceptional winter, with some news agencies placing us at 180% of our normal snowpack in the lowlands, and 130% in the higher elevations. Good for the skiing, the lake, and the fish. Not particularly conducive to the blogging boatbuilder. The current snowpack here at home is about 18", and its basically a monolith of ice, as the snow has been through many freeze-thaw cycles. What is nice, however, is it's ending!
Here is a good example:
Normal snow year:
This year:
Sun broke out the other day, many scurried away from the bright, horrible burning orb floating where the clouds normally are, until a few intrepid citizens found the heat to actually be a good thing. The snow from SWMBO's car melted into lakes, so I spent a good deal of time sweeping that out.
This instigated a little rejuvenation of the boatbuilding virus. Once the ice and snow and water were moved, well lets get this tidied up. Thats better, now let us clean this. Hey, these need to be put outside, but this needs to be over here on the shop wall. Okay, now that this is happening, let's get serious and pull her out of the garage to get things really tidy....
Ahhhh. Now Im thinking about how I can do this, fix that, get this sanded, recoat that, and lets get some paint on this pig!
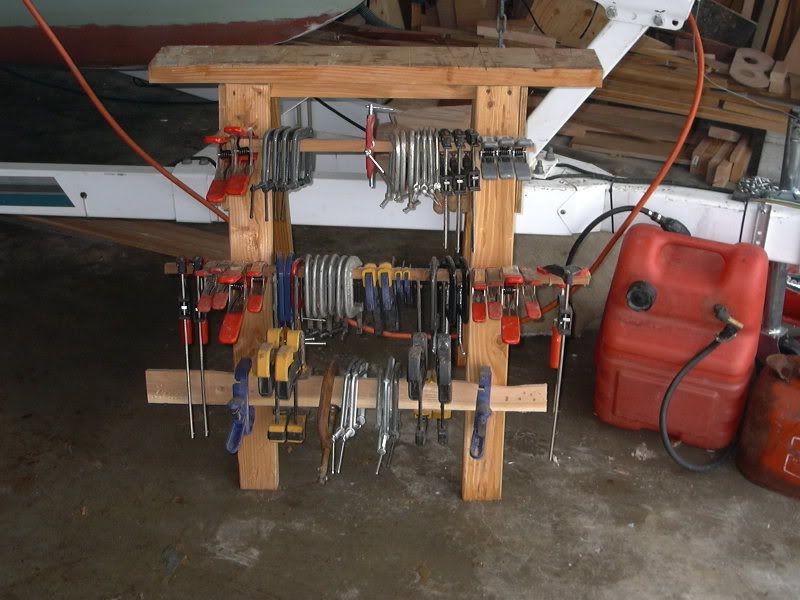
I also took a few minutes and made a little more convenient clamp rack out of my last remaining sawhorse that isn't a motor stand. Pretty snazzy, eh?
A friend has donated some clamps to the cause temporarily, but I am getting far enough ahead to be able to call most of those my own. There is a rowboat project and a workboat project in the offing that will require more use of clamps than this one has....
Also working on SWMBO to help me develop a REAL webpage! Blogger is great, but there will be more boats, with more stories, and more mildly irritating banter, which all need to be compactly held together in one place. You will be the first to know....
E
Subscribe to:
Posts (Atom)